

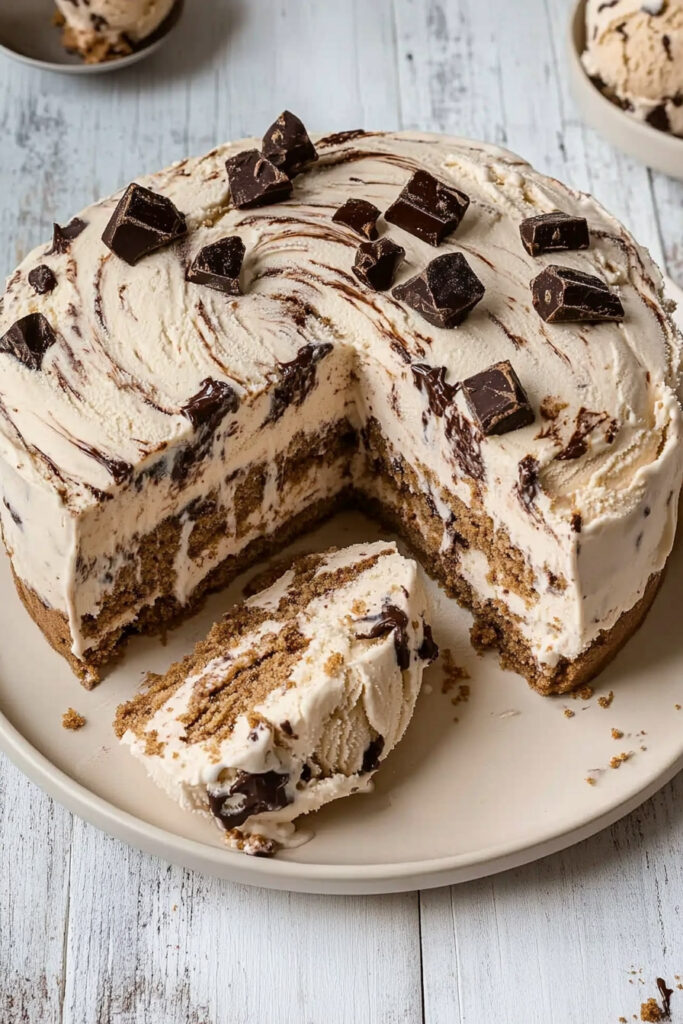
Let’s be honest—who doesn’t love cookie dough? Now, picture combining that with creamy vanilla ice cream and a crunchy chocolate shell to create one epic dessert: the Cookie Dough Ice Cream Cake. It’s like all your favorite treats rolled into one!
A little backstory: Ice cream cakes have been around for centuries, inspired by layered desserts like trifles. Fast forward to the 1980s, and cookie dough became a sensation thanks to Ben & Jerry’s. This recipe builds on that magic, layering homemade cookie dough with ice cream. The result? A show-stopping dessert perfect for birthdays, summer get-togethers, or whenever you need a sweet pick-me-up.
Ready to get started? Good news—it’s easier than you think. Let’s dive in!

At a Glance
- Prep Time: 30 minutes (plus 4 hours for freezing)
- Servings: 8 slices
- Skill Level: Beginner-friendly, with a little patience for freezing
- What You’ll Need:
- 8-inch round cake tin (springform works best)
- Mixer (stand or hand)
- Plastic wrap or parchment paper
- Microwave-safe bowl (for chocolate)
- Optional: Offset spatula
Pro tip: Make it the night before and let it freeze overnight. Leftovers? They’ll keep in the freezer for up to a week.

Ingredients
Cookie Dough
- 1½ cups all-purpose flour (heat-treated for safety)
- ¾ cup unsalted butter (room temperature)
- 1 cup brown sugar
- ½ cup granulated sugar
- 1 tsp vanilla extract
- ¾ tsp salt
- 200g dark chocolate, chopped
Ice Cream Layer
- 1 pint of vanilla ice cream (slightly softened)
Chocolate Shell
- ¾ cup heavy cream
- 200g dark chocolate, chopped
Need to Adapt?
- Gluten-free? Use gluten-free flour.
- Vegan? Try dairy-free butter and coconut milk-based ice cream.
- Sweeter tooth? Swap dark chocolate for milk chocolate.
Step-by-Step Instructions
Step 1: Heat-Treat Your Flour
Heat your oven to 350°F. Spread the flour on a baking tray and bake for 5–10 minutes to kill off any bacteria. Let it cool completely before you use it.
Step 2: Prep Your Cake Tin
Line an 8-inch round cake tin with parchment paper or plastic wrap, leaving some extra on the sides. Trust me—this makes it easier to lift the cake out later.
Step 3: Make the Cookie Dough
- Beat the butter, sugars, salt, and vanilla together until they’re light and fluffy. (This takes around 5 minutes with a mixer.)
- Slowly add the cooled flour and mix until just combined.
- Stir in the chopped chocolate by hand. Don’t overmix! You want a soft dough that isn’t sticky.
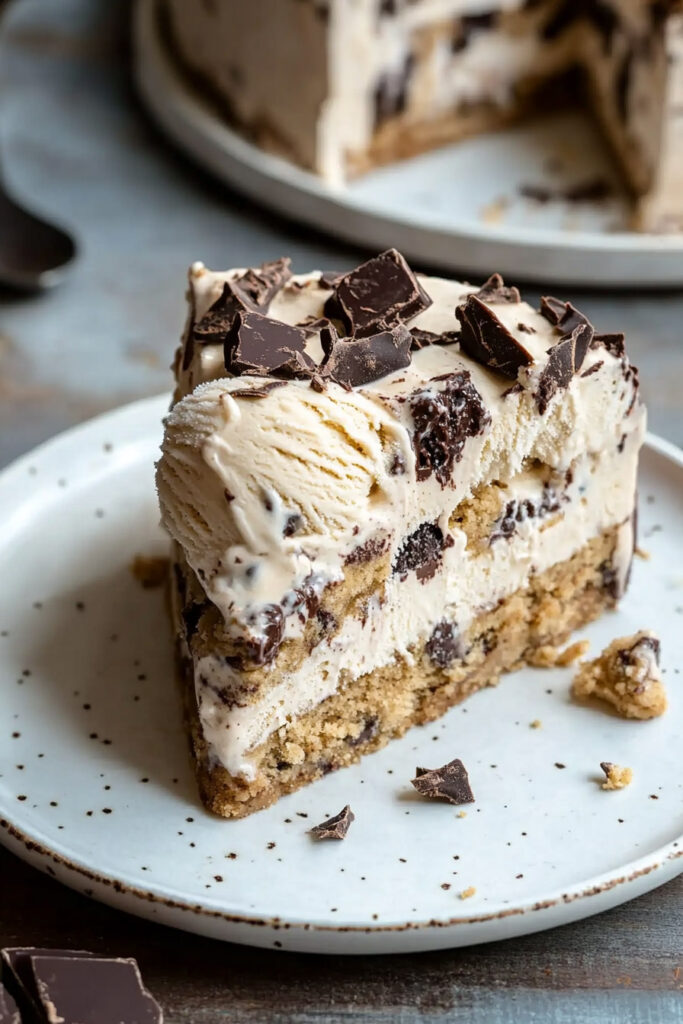
Step 4: Layer It Up
- Divide the cookie dough in half. Press one half into the bottom of the cake tin to form the base. Pop it in the freezer for 5 minutes.
- Spread a layer of softened vanilla ice cream over the cookie dough. Smooth it out with an offset spatula if you have one. Freeze it for 10–15 minutes.
- Press the remaining cookie dough on top to seal in the ice cream layer. Freeze for at least 4 hours—or better yet, overnight.
Step 5: Add the Chocolate Shell
Heat the cream and chocolate in a microwave-safe bowl, mixing in 20–30 second bursts until smooth. Let it cool for a few minutes. Then pour it over the frozen cake. The cold cake will make the chocolate set into a delicious crunchy shell.
Step 6: Serve It Up!
Take the cake out of the freezer about 5 minutes before serving. This makes slicing a breeze. Use a sharp knife warmed in hot water for clean cuts. Want to go all out? Garnish with whipped cream or extra cookie dough balls.
Customize Your Cake
Dietary Swaps
- Gluten-free: Use almond or gluten-free flour.
- Vegan: Opt for vegan butter, coconut cream, and dairy-free ice cream.
Fun Add-Ons
- Mix in peanut butter chips or caramel chunks for extra flair.
- Swap the vanilla ice cream for salted caramel, coffee, or whatever flavor you fancy!
Seasonal Twists
Warm caramel sauce is perfect in winter. Fresh berries? A summer dream.
Storing and Serving Tips
- Serving: Serve slices on chilled plates (less mess). Pair it with a cup of coffee or a fresh fruit salad for balance.
- Storing: Wrap leftovers tightly in plastic wrap or keep them in an airtight container. They’ll stay delicious for up to a week in the freezer.
- Tip: Never reheat it—just let it sit at room temperature for a few minutes before serving.
When you dig into this Cookie Dough Ice Cream Cake, it’s more than dessert—it’s a little slice of happiness. Whether you’re sharing it with friends or enjoying a quiet treat for yourself, this recipe is a guaranteed crowd-pleaser.
Now go make it, and happy baking!
PrintCookie Dough Ice Cream Cake
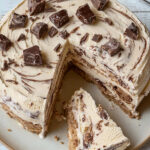
This Cookie Dough Ice Cream Cake is a dreamy dessert that combines layers of creamy vanilla ice cream, rich edible cookie dough, and a luscious chocolate shell. Perfect for celebrations or indulgent weekends, this no-bake treat is easy to make and irresistibly delicious.
- Prep Time: 30 minutes
- Cook Time: 10 minutes (for heat-treating flour)
- Total Time: 4 hours 40 minutes (includes freezing)
- Yield: 8 slices 1x
- Category: Dessert
- Cuisine: American
Ingredients
For the Cookie Dough:
- 1½ cups all-purpose flour (heat-treated)
- ¾ cup unsalted butter, room temperature (170g)
- 1 cup brown sugar (200g)
- ½ cup granulated sugar (100g)
- 1 teaspoon pure vanilla extract
- ¾ teaspoon fine sea salt
- 200g dark chocolate, finely chopped
For the Ice Cream Layer:
- 1 pint vanilla ice cream (softened slightly)
For the Chocolate Shell:
- ¾ cup heavy whipping cream (170g)
- 200g dark chocolate, finely chopped
Instructions
Preheat the oven to 350°F (175°C). Spread the flour evenly over a baking sheet and bake for 5–10 minutes to make it safe for raw consumption. Let it cool completely before using.
Line an 8-inch round cake tin with parchment paper or plastic wrap, leaving enough overhang on the sides to act as a sling for easy removal.
In a stand mixer fitted with a paddle attachment, beat butter, sugars, salt, and vanilla extract on medium speed until light and fluffy (about 5–7 minutes). Gradually mix in the cooled flour until just combined. Stir in chopped chocolate by hand. Divide the dough into two equal portions.
Press half of the cookie dough into the bottom of the prepared cake tin to form a base layer. Freeze for about 5 minutes to firm up slightly. Spread softened vanilla ice cream evenly over this layer using an offset spatula. Freeze again until firm (10–15 minutes). Press the remaining cookie dough on top of the ice cream layer to seal it in. Freeze for at least four hours or overnight for best results.
In a microwave-safe bowl, combine heavy cream and chopped chocolate. Microwave in short intervals (20–30 seconds), stirring after each interval until smooth and glossy. Let it cool slightly before pouring over your frozen cake. The chocolate will harden quickly upon contact with the cold surface.
Remove the cake from the freezer about five minutes before serving to make slicing easier. Use a sharp knife dipped in hot water for clean cuts. Garnish with extra cookie dough chunks or whipped cream if desired.
Notes
Serving Suggestions:
- Serve chilled slices with a drizzle of caramel or fudge sauce for extra decadence. Pair with hot coffee or espresso for contrast.
Tips & Tricks:
- Soften ice cream slightly for easier spreading but avoid letting it melt completely.
- Use parchment paper or plastic wrap to ensure easy removal from the tin.
- Dip your knife in hot water before slicing for clean cuts.
Storage & Reheating:
- Store leftovers tightly wrapped in plastic wrap or an airtight container in the freezer for up to one week. Avoid reheating; simply let slices sit at room temperature for about five minutes before enjoying.