

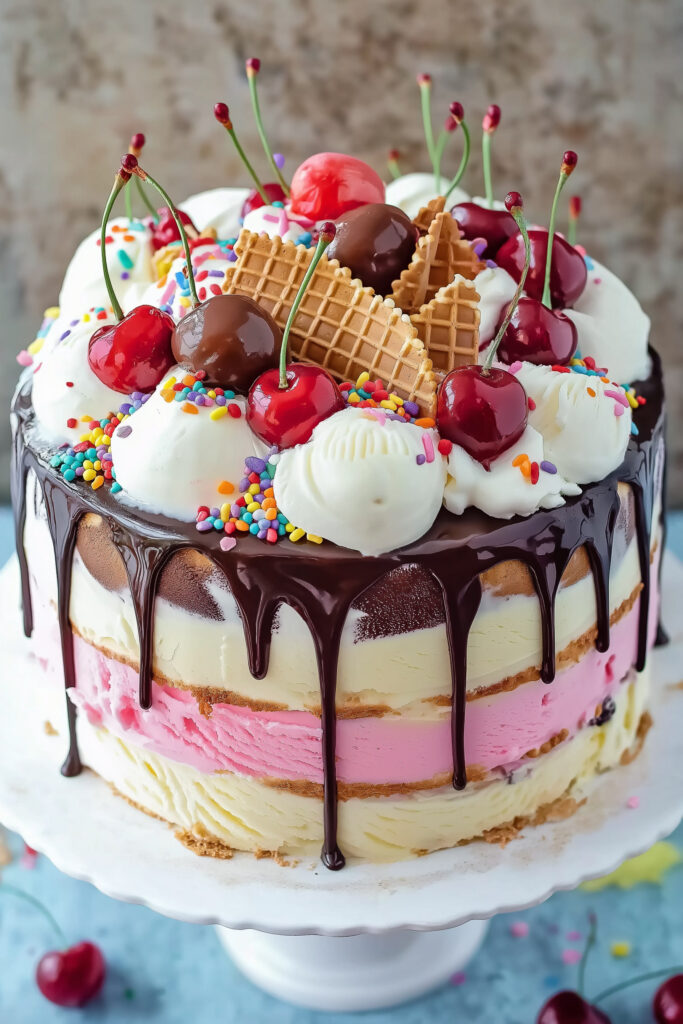
Neapolitan Ice Cream Cake is the ultimate throwback dessert. It’s got everything you love—chocolate, vanilla, and strawberry—layered into a show-stopping treat that looks as good as it tastes. Fun fact? It’s inspired by the Italian flag and the culinary vibes of Naples, Italy. My take on it? A combo of soft sponge cake and creamy ice cream, crowned with fluffy whipped cream. Perfect for birthdays, summer parties, or when you just want to treat yourself. Trust me, this one’s a hit every time.
Recipe at a Glance
- Time Commitment: About an hour hands-on + 6 hours freezing
- Serves: 12–16 people
- Skill Level: Moderate (but don’t worry, patience pays off!)
- What You’ll Need:
- Mixer (hand or stand)
- Three 8-inch cake pans
- Offset spatula (for smooth layers)
- Springform pan or acetate sheet (optional but makes it look more pro)
- Piping bags (if you’re feeling fancy!)
Planning Ahead?
- Bake the cake layers up to two days ahead. Store them airtight.
- Assembled cakes hold up great in the freezer for two days.
Ingredients
Cake Layers
- 2 cups cake flour (or DIY it with all-purpose flour + cornstarch)
- 2 tsp baking powder
- ½ tsp salt
- ½ cup vegetable oil (or grapeseed oil)
- 1¼ cups sugar, divided
- 2 tsp vanilla extract
- 6 large egg yolks (room temp—save those whites!)
- ½ cup whole milk (room temp)
- 8 large egg whites (room temp)
- ¾ tsp cream of tartar
Ice Cream Layers
- 1 quart each of strawberry, vanilla, and chocolate ice cream (soften slightly)
Whipped Cream Frosting
- 4 cups cold heavy cream
- ⅓ cup powdered sugar
- 2 tsp vanilla extract
Optional Garnishes
- Maraschino cherries
- Sprinkles, chocolate shavings, or even a drizzle of ganache
How to Make It
1. Bake Your Cake Layers
Start by preheating your oven to 350°F and preparing two 8-inch round cake pans with parchment paper. In a bowl, mix the dry ingredients—flour, baking powder, and salt—and set them aside. In another bowl, beat the oil and sugar together until the mixture is light and fluffy, then add the vanilla extract and egg yolks, one at a time, making sure each is fully incorporated. Alternate adding the dry mixture and milk in three batches, beginning and ending with the dry ingredients.
In a separate bowl, whip the egg whites with cream of tartar until stiff peaks form. Gently fold the fluffy egg whites into your batter to keep it light and airy. Divide the batter evenly between the prepared pans, smoothing the tops, and bake for 25–28 minutes, or until a toothpick inserted into the center comes out clean. Once the cakes are completely cooled, slice each one into two thinner layers, so you’re left with four cake rounds.
2. Make the Ice Cream Layers
To prepare your ice cream layers, line three clean 8-inch cake pans with heavy-duty foil or parchment paper. Let each flavor of ice cream sit at room temperature for about 15 minutes to soften slightly, making it easier to spread. Spoon the strawberry ice cream into one of the pans, the vanilla into another, and the chocolate into the third. Smooth each layer using an offset spatula warmed under hot water for that perfectly even finish. Place the pans in the freezer and let the ice cream firm up for at least two hours or until completely solid.
3. Assemble the Cake
When it’s time to assemble the cake, start by placing one of the sponge cake layers on a sturdy cake board or serving platter. Top it with the firm strawberry ice cream layer, carefully peeling it away from its foil or parchment liner. Add a second sponge cake layer on top of the strawberry layer, followed by the vanilla ice cream. Layer on another cake round, then the chocolate ice cream, and finish with the final sponge cake round on top. Once fully assembled, transfer the cake to the freezer and allow it to set overnight or for at least three hours. This ensures all the layers bond together nicely for clean slicing.
4. Frost & Decorate Like a Pro
For the whipped cream frosting, whip the chilled heavy cream in a stand mixer or with a hand mixer until it begins to thicken and form soft peaks. Add the powdered sugar and vanilla extract, then continue whipping until you reach medium peaks—the frosting should hold its shape but still be easy to spread. Reserve about two cups of whipped cream if you’d like to pipe rosettes or decorative designs later.
Evenly coat the top and sides of the frozen cake with the remaining whipped cream, using an offset spatula to smooth it out. If you’re feeling creative, use the reserved whipped cream to pipe borders or patterns. Finish it off with a sprinkle of colorful sprinkles, a maraschino cherry on top, or even some chocolate shavings or drizzled ganache for a fancier look. Be sure to freeze the frosted cake until you’re ready to serve!
Tips, Tweaks & Tasty Variations
Want to Mix It Up?
- Seasonal Twist: Swap strawberry ice cream for mango in summer or peppermint in winter.
- Diet-Friendly: Try gluten-free flour or go dairy-free with plant-based ice creams.
- Everyday vs Fancy: Keep it simple for weeknight fun or add drizzle, gold leaf, and edible flowers for a party showstopper.
Serving Tips: Use a warm knife (run it under hot water and wipe dry) to make clean slices.
Leftovers? Wrap them tight in plastic wrap and foil to avoid freezer burn. They’re good for 2–3 days.
This Neapolitan Ice Cream Cake isn’t just dessert—it’s a little slice of childhood nostalgia with a grown-up twist. Whether you follow every step or take shortcuts with store-bought elements, you’re guaranteed happy faces and empty plates. So…what are you waiting for? Go for it!
PrintNeapolitan Ice Cream Cake

This Neapolitan Ice Cream Cake is a show-stopping dessert that combines layers of fluffy sponge cake and creamy chocolate, vanilla, and strawberry ice cream. Topped with whipped cream and playful garnishes, it’s perfect for birthdays, summer parties, or any celebration. A nostalgic treat with a modern twist!
- Prep Time: 1 hour
- Cook Time: 30 minutes
- Total Time: 7 hours (including freezing)
- Yield: 12–16 slices 1x
- Category: Dessert
- Cuisine: American-Italian Fusion
Ingredients
For the Cake:
- 2 cups cake flour
- 2 tsp baking powder
- ½ tsp table salt
- ½ cup grapeseed oil (or vegetable oil)
- 1¼ cups + 2 tbsp granulated sugar (divided)
- 2 tsp vanilla extract
- 6 large egg yolks (room temperature)
- ½ cup whole milk (room temperature)
- 8 large egg whites (room temperature)
- ¾ tsp cream of tartar
For the Ice Cream Layers:
- 1 quart vanilla ice cream (softened slightly)
- 1 quart strawberry ice cream (softened slightly)
- 1 quart chocolate ice cream (softened slightly)
For the Whipped Cream Frosting:
- 4 cups heavy cream (cold)
- ⅓ cup powdered sugar
- 2 tsp vanilla extract
Garnish:
- Maraschino cherries with stems (optional)
- Sprinkles or chocolate shavings (optional)
Instructions
Preheat your oven to 350°F. Grease and line two 8-inch round cake pans with parchment paper. Sift together the flour, baking powder, and salt in a bowl. In a stand mixer, beat oil and sugar until light and fluffy. Add vanilla extract and egg yolks one at a time, mixing well. Alternate adding dry ingredients with milk in three batches, starting and ending with dry ingredients.
In another bowl, whisk egg whites with cream of tartar until stiff peaks form. Gently fold the egg whites into the batter to retain its airy texture. Divide evenly between pans and bake for 25–28 minutes or until a toothpick comes out clean. Cool completely before slicing each layer horizontally into two thinner layers.
Line three clean cake pans with heavy-duty foil or parchment paper. Spread softened vanilla, strawberry, and chocolate ice creams into separate pans using an offset spatula warmed under hot water for smooth layers. Freeze each layer for at least two hours until firm.
Place one sponge layer on a serving platter or cake board. Top it with the strawberry ice cream layer, carefully removing it from its foil liner. Add another sponge layer, followed by the vanilla ice cream layer, another sponge layer, then the chocolate ice cream layer. Finish with the final sponge layer on top. Freeze overnight or for at least three hours to set completely.
Whip cold heavy cream until soft peaks form. Add powdered sugar and vanilla extract; whip until medium peaks form. Reserve about two cups of whipped cream in a piping bag for decoration if desired.
Spread the remaining whipped cream evenly over the top and sides of the frozen cake using an offset spatula. Decorate with piped rosettes, sprinkles, cherries, or drizzled chocolate sauce as desired.
Notes
Serving Suggestions:
Slice using a warm knife for clean cuts—run it under hot water and wipe dry between slices. Serve immediately on chilled plates to prevent melting.
Tips & Tricks:
- Use an acetate sheet around the cake for cleaner edges during assembly.
- Soften ice creams just enough to spread easily but not melt.
- Freeze each layer thoroughly to maintain structure.
Storage & Reheating:
Wrap leftover slices tightly in plastic wrap followed by foil to prevent freezer burn; store in the freezer for up to two days. This dessert is best served frozen—avoid reheating! Allow it to sit at room temperature for five minutes before slicing if too firm.