

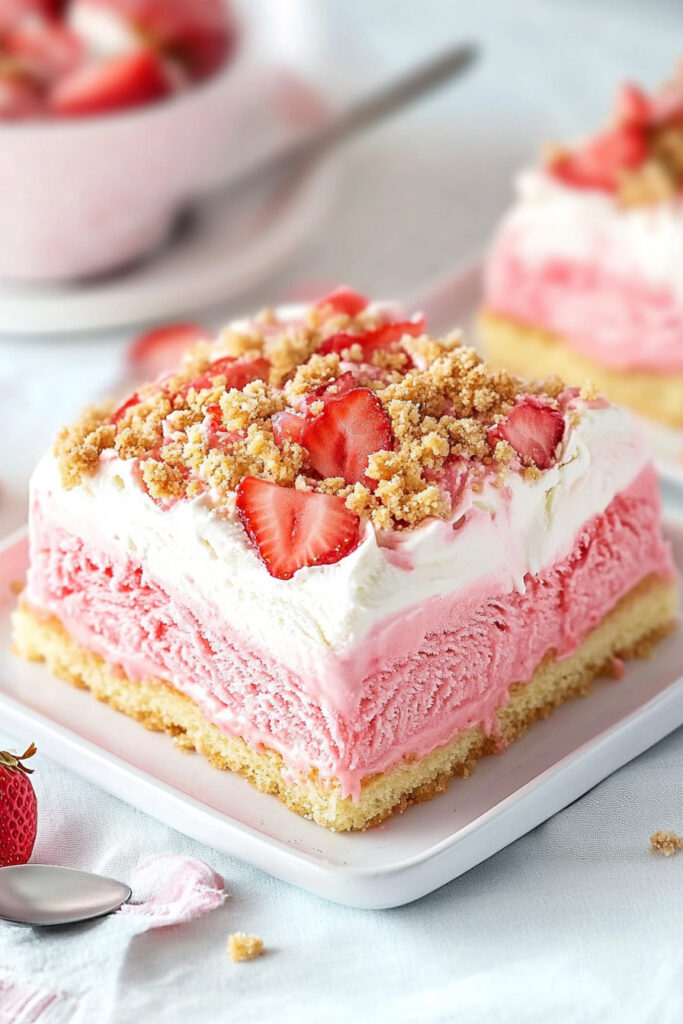
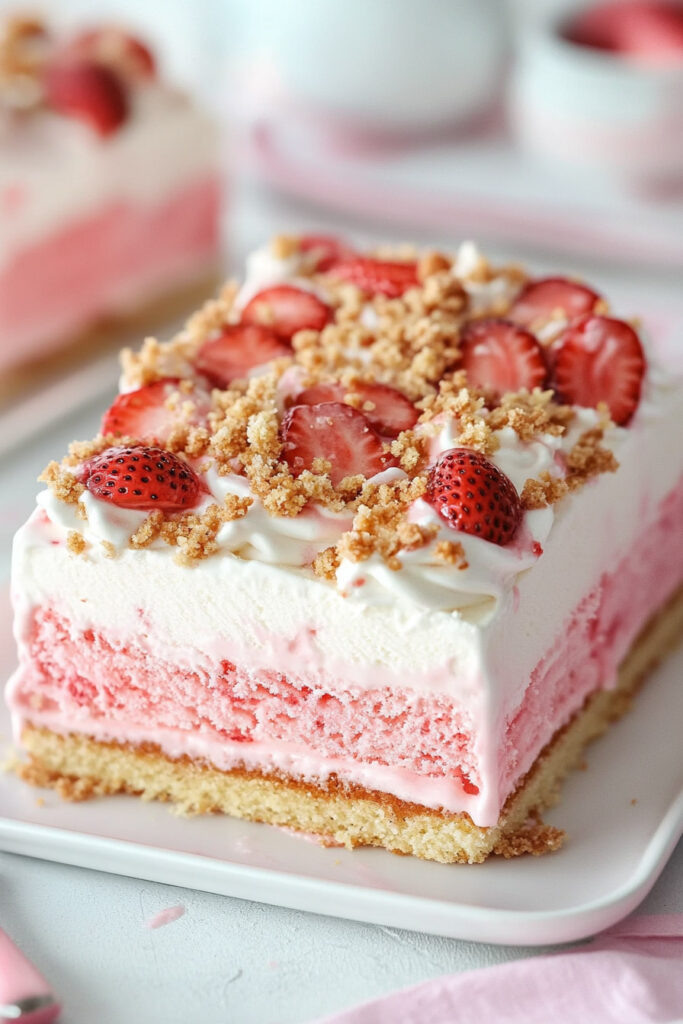
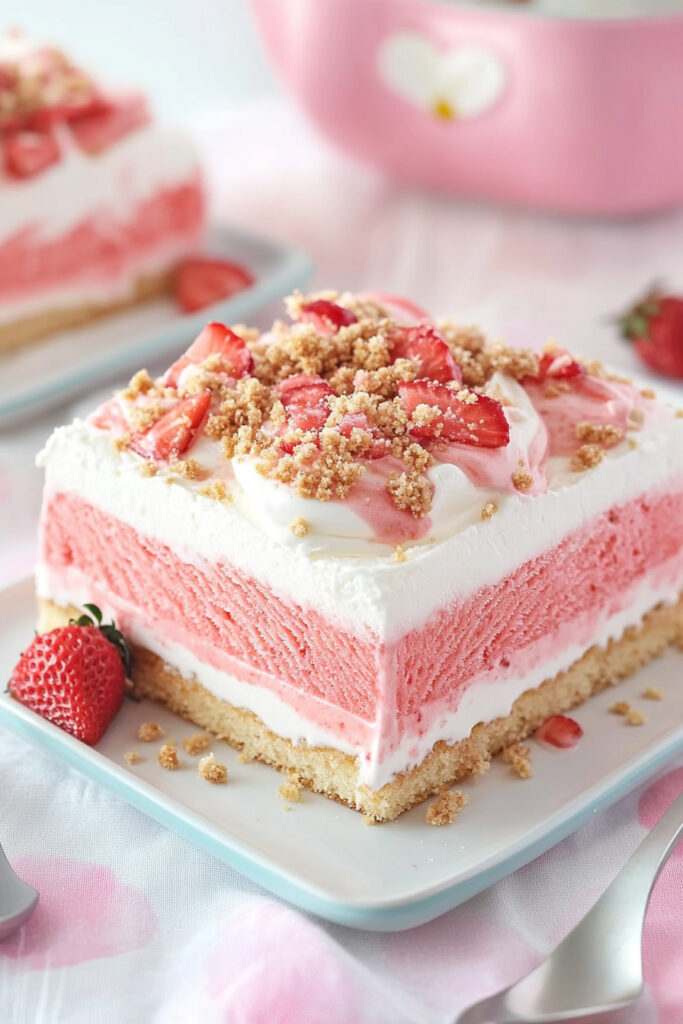
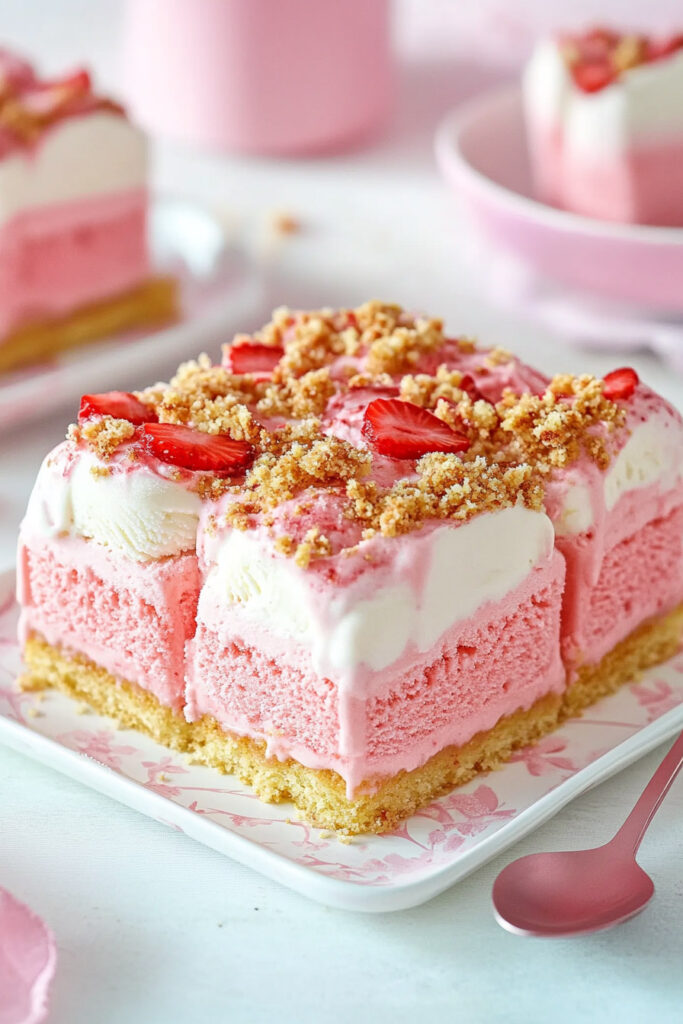
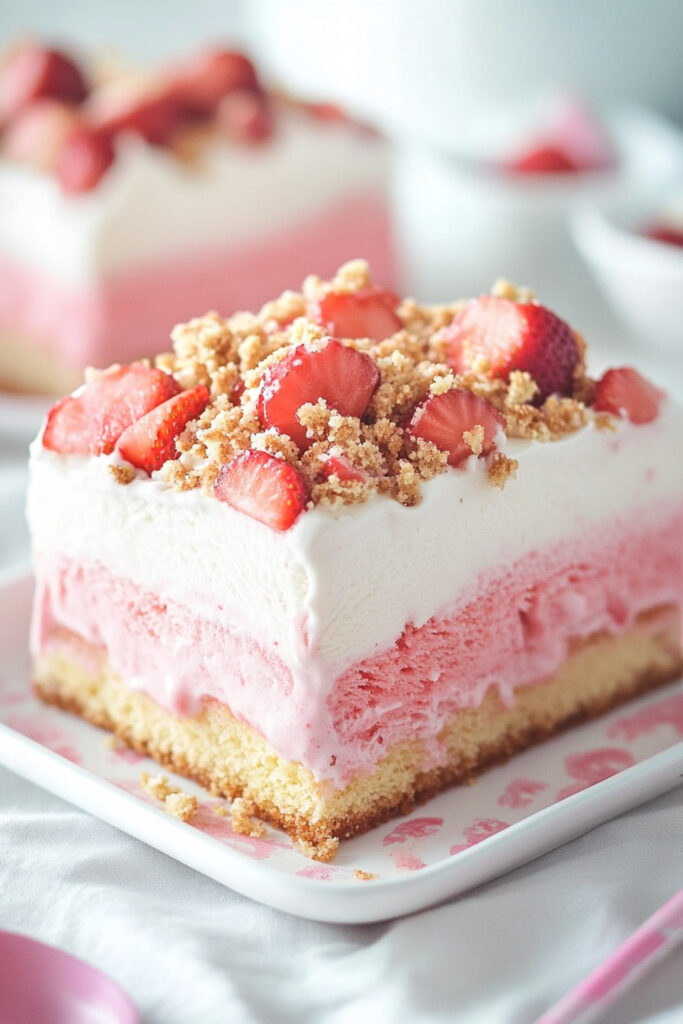
Let me take you back to those carefree summer days—eating Good Humor Strawberry Shortcake Bars by the pool. This Strawberry Crunch Ice Cream Cake? It’s like reliving that memory, but even better. Imagine fluffy yellow cake, creamy strawberry ice cream, and that crunchy, sweet strawberry topping all coming together in one perfect bite. It’s the ultimate dessert for summer parties, birthdays, or just because.
The best part? You don’t need to be a pro in the kitchen to make it. With a few simple steps—and a little time in the freezer—you’ll have a dessert that looks and tastes like a winner. Ready to give it a try? Let’s dive in.
The Basics
Here’s a quick overview before we get started:
- Prep Time: 30 minutes
- Bake Time: 22 minutes
- Freezing Time: 6–8 hours (or overnight)
- Total Time: About 8.5 hours
- Servings: 12 slices
Tools You’ll Need
- A 13×9 inch baking dish
- Mixer (hand or stand works)
- Food processor (or a rolling pin + Ziploc bag if you’re improvising)
- Parchment paper
- An offset spatula (optional, but makes life easier)
Ingredients You’ll Need
For the Cake Layer:
- ½ cup unsalted butter (softened)
- 1 cup granulated sugar
- 2 large eggs (room temp)
- ½ tablespoon vanilla extract
- 1½ cups all-purpose flour
- ½ tablespoon baking powder
- ¼ teaspoon salt
- ½ cup whole milk (room temp)
For the Ice Cream Layer:
- 1.75 quarts (1 container) of strawberry ice cream (softened)
For the Whipped Topping:
- 1½ cups heavy cream (cold)
- 1 teaspoon vanilla extract
For the Crunch Topping:
- 5 oz mini vanilla wafers (about ½ a package)
- ½ oz freeze-dried strawberries (about ½ a package)
- ½ tablespoon strawberry gelatin powder
- 3 tablespoons unsalted butter (melted)
Substitutions:
- No Vanilla Wafers? Use Golden Oreos or shortbread cookies instead.
- Out of Freeze-Dried Strawberries? Freeze-dried raspberries are a great swap for a tangy twist.
How to Make It
Step 1: Bake the Yellow Cake
Preheat your oven to 350°F and grease a 13×9 pan. In a mixer, cream butter and sugar until it’s light and fluffy. Beat in the eggs, one at a time, then add vanilla.
In another bowl, mix your flour, baking powder, and salt. Slowly add these dry ingredients to the wet mixture, alternating with the milk. Start and finish with the dry mix to keep things smooth.
Pour the batter into your prepared pan and bake for 20–22 minutes. You’ll know it’s done when it’s golden on top and a toothpick comes out clean. Let it cool completely.
Tip: Be gentle when mixing—overmixing will make your cake dense.
Step 2: Ice Cream Layer
Let the strawberry ice cream sit on the counter for about 20 minutes until it’s soft, like frosting. Spread it over the cooled cake with an offset spatula (or a spoon works too). Freeze for at least 2–4 hours.
What to Watch For: You want the ice cream soft enough to spread but not melted into a puddle.
Step 3: Whip the Cream
In a cold mixing bowl, whip the heavy cream with vanilla. Beat it until you see stiff peaks—it should hold its shape when you lift the whisk. Spread it over the frozen ice cream layer.
Pro Tip: Chill your mixing bowl and whisk beforehand. It makes whipping cream so much easier!
Step 4: Crunch Topping
In a food processor, pulse your mini vanilla wafers and freeze-dried strawberries into crumbs. Add the strawberry gelatin powder, then drizzle in the melted butter while pulsing. You want everything to stick together slightly.
No food processor? No problem. Throw the cookies and strawberries in a Ziploc bag and crush them with a rolling pin, then mix in the gelatin and butter in a bowl.
Sprinkle the topping over the whipped cream, pressing it down gently. Cover the dish loosely with plastic wrap and freeze for 4 hours (or overnight).
Fun Variations
- Gluten-Free: Use gluten-free cookies.
- Vegan: Use dairy-free ice cream and coconut whipped cream.
- Berry Twist: Swap strawberry ice cream for raspberry sorbet.
- Chocolate Lovers: Add mini chocolate chips to the topping or mix cocoa into the whipped cream.
Want a summer vibe? Top the cake with fresh strawberries, blueberries, or mint leaves before serving.
How to Slice & Serve
Cut the cake with a sharp knife warmed in hot water (and wipe it clean between slices). Serve on chilled plates so the layers stay intact.
Store leftovers tightly covered in the freezer for up to a week. Before serving, let slices sit out for 5 minutes so they’re easier to cut.
Why You’ll Love It
This cake is more than a dessert—it’s a trip down memory lane. Creamy, crunchy, and packed with berry flavor, it’s the kind of treat that brings smiles to every table. Make it for a party, a birthday, or just because it’s a sunny day.
The result? A slice of happiness. Every. Single. Time.