

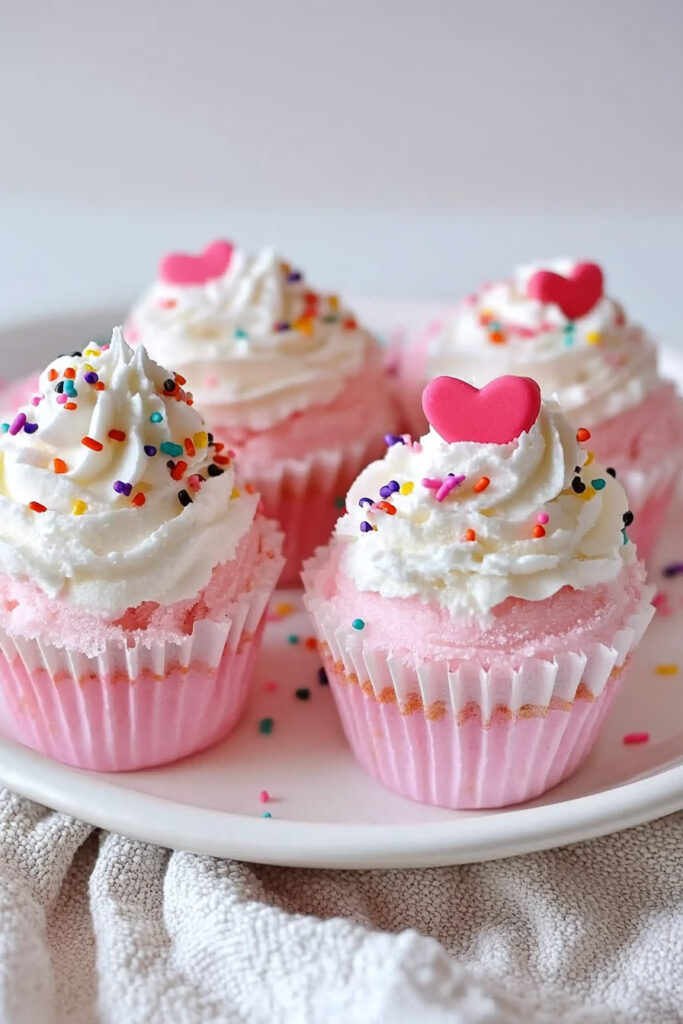
Sometimes, you just need a dessert that’s a little extra special—something fun, nostalgic, and guaranteed to make everyone smile. Ice Cream Cupcakes are exactly that. They’re like a mash-up of two childhood favorites: cupcakes AND ice cream! Perfect for summer parties or a random weekend treat, these little bites of happiness are super easy to make and don’t require fancy skills. Think of it like making cupcakes, but with an ice cream twist. Let’s jump in—you’re going to love this!
What You Need to Know Before We Start
Here’s a quick rundown of the recipe:
- Time Commitment: About 2 hours 35 minutes total—20 minutes to prep, 15 minutes to bake, and 2 hours to freeze.
- Servings: Makes 12 cupcakes, but you can adjust the recipe depending on your crowd. Got a big freezer? Double the batch!
- Skill Level: Totally beginner-friendly. The whipped cream frosting might need a little extra care, but don’t worry—I’ve got helpful tips for you.
- Gear List:
- Muffin tin and cupcake liners
- Electric mixer (or a good whisk if you’re feeling ambitious)
- Microwave-safe bowl
- Freezer space
Pro Tip: These cupcakes are great for prepping ahead! Bake and freeze them up to 2 days in advance. Just frost right before serving.
What You’ll Need
Here’s the ingredient list, with a few ways to adapt if needed:
For the Cake Base:
- Yellow Cake Mix: Any brand works—I like Duncan Hines for its reliable results. Grab whatever ingredients the box calls for (probably eggs, oil, and water).
- Sprinkles (Optional): If you want an extra pop of color, throw in ¼ cup of sprinkles. Skip them if you’re going for a clean look.
For the Ice Cream Layer:
- Cake Batter Ice Cream: About 3 cups, softened. If you can’t find cake batter ice cream, go with vanilla or birthday cake flavor—they’re just as amazing.
For the Whipped Cream Frosting:
- Heavy Whipping Cream: 1½ cups, chilled. The colder, the better for whipping!
- Powdered Sugar: 1½ cups to sweeten things up.
- Unflavored Gelatin: 1½ teaspoons (for stabilization).
- Water: 4 teaspoons, to dissolve the gelatin.
- Vanilla Extract: 1 teaspoon for that perfect hint of flavor.
Step-by-Step Instructions
Ready to whip up some magic? Let’s do this.
Step 1: Bake the Cake Base
Start by preheating your oven to 350°F and lining a muffin tin with cupcake liners. Follow the directions on your cake mix box to make the batter. If you’re using sprinkles, fold them in gently—don’t overmix.
Spoon about 1 tablespoon of batter into each liner. Keep it thin; the ice cream layer is coming later! Bake for 15 minutes or until the tops are springy. Let them cool completely right in the pan. (Trust me, it’s easier to work with them this way.)
Step 2: Add the Ice Cream Layer
Once the cupcakes are cool, grab your softened ice cream. Scoop a generous layer onto each cupcake, filling the liners to the top. Smooth it out so it looks nice and even.
Pop the whole muffin tin into the freezer and let it chill for at least 2 hours. You want the ice cream layer to be firm before decorating.
Step 3: Make Whipped Cream Frosting
While your cupcakes freeze, it’s frosting time! Dissolve the gelatin in water (microwave for about 20 seconds) and let it cool slightly—it should be lukewarm.
Meanwhile, whip the heavy cream, powdered sugar, and vanilla extract until soft peaks form. Slowly add the gelatin while whipping, and keep going until stiff peaks appear. If it feels too soft, toss it in the fridge for a few minutes to firm up.
Step 4: Frost and Finish
When the ice cream is done freezing, it’s showtime. Pipe or dollop the whipped cream frosting onto each cupcake using a pastry bag or just a spoon. Add some colorful sprinkles on top for that final touch. Done!
Fun Twists to Try
Want to personalize your Ice Cream Cupcakes? Here are some ideas:
- Gluten-Free/Dairy-Free: Use gluten-free cake mix and dairy-free ice cream, like coconut-based options. Coconut whipped cream works great as a frosting alternative too.
- Seasonal Swaps: Add crushed candy canes for the holidays or fresh fruit slices for summer flair.
- Fancy Add-Ons: Drizzle some chocolate ganache on top or sprinkle edible glitter for a party-ready look.
Serving & Storing Tips
Serving: Ice Cream Cupcakes are best served straight from the freezer. Pair them with fresh fruit or chocolate sauce if you want to get extra fancy.
Storing: Keep unfrosted cupcakes tightly covered in the freezer for up to 2 days. Frost them right before eating for the best texture. If you have leftovers (rare, but possible), store them in an airtight container back in the freezer.
These Ice Cream Cupcakes are more than just dessert—they’re pure joy in every bite. Whether you’re making them for a birthday party, a backyard BBQ, or just because, they’re guaranteed to bring smiles. Give them a try and let me know how they turned out. Happy baking!