

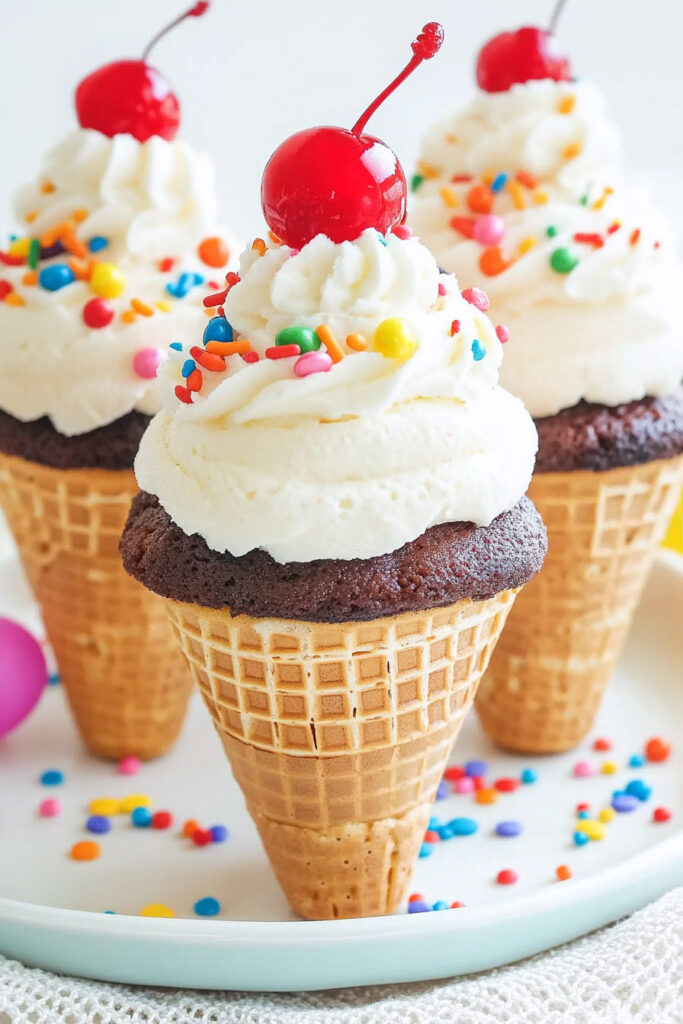
Desserts that remind us of childhood are the best, aren’t they? Ice Cream Cone Cupcakes check all the boxes—adorable, nostalgic, and just plain fun. They’re basically cupcakes baked inside ice cream cones and topped with frosting to look like soft-serve ice cream. Cool, right?
They’re perfect for birthday parties, summer barbecues, or even a rainy day baking project with the kids. Bonus? They’re super easy to make, even if you’re not exactly a baking pro. Stick with me, and I’ll guide you step by step to whip up these cuties—no stress, I promise!
What You Need to Know
Here’s a quick overview of the recipe before we dive in:
- Time: 20 minutes to prep + 20 minutes to bake = 40 minutes total.
- Servings: Makes 24 cupcakes, but you can easily cut the recipe in half or double it.
- Skill Level: Completely beginner-friendly. If you can mix batter and pipe frosting, you’re golden.
- Tools: Muffin tin, mixing bowl, piping bag (or a zip-top bag), and a few basics.
- Make-Ahead Option: Bake the cupcakes a day ahead, then frost them right before serving—they’ll stay fresh and tasty.
Ingredients
Here’s what you’ll need to make these cupcake cones:
Cupcakes:
- 1 box of cake mix (plus the ingredients listed on the box—usually eggs, oil, and water). I went with vanilla because it feels classic, but chocolate, funfetti, or red velvet work too.
- 24 flat-bottomed ice cream cones: Make sure they’re sturdy so they hold the batter without cracking.
Frosting & Toppings:
- 2 cups of frosting (store-bought or homemade). Buttercream is your best bet—it pipes beautifully and doesn’t melt. Whipped cream frosting is good if you want something lighter.
- Rainbow sprinkles (optional): Because sprinkles make everything better!
- 24 maraschino cherries (optional): Totally optional, but they add a retro charm on top.
Substitutions:
- No flat-bottom cones? Use cupcake liners, but they won’t have the cone effect.
- Gluten-free? Grab a gluten-free cake mix and cones.
- Vegan? Use a vegan cake mix and frosting—it’s easy to swap!
Let’s Bake!
Here’s the step-by-step process. Imagine we’re baking together—it’s more fun that way.
1. Preheat Your Oven
First things first, heat your oven to 350°F (175°C).
2. Mix the Batter
Prepare the cake mix according to the box (or your recipe). The goal is smooth, pourable batter—kind of like pancake batter.
3. Set Up the Cones
Stand your cones upright in a muffin tin. If they’re wobbly, use small pieces of aluminum foil to create little “holders” around them.
4. Fill & Bake
Fill each cone about two-thirds full with batter—any more, and you risk a cupcake explosion. Bake for 18–22 minutes. When a toothpick comes out clean, they’re done!
5. Cool the Cupcakes
Let them cool completely in the muffin tin. Trust me, frosting warm cupcakes is a bad idea—been there, learned the hard way.
6. Pipe the Frosting
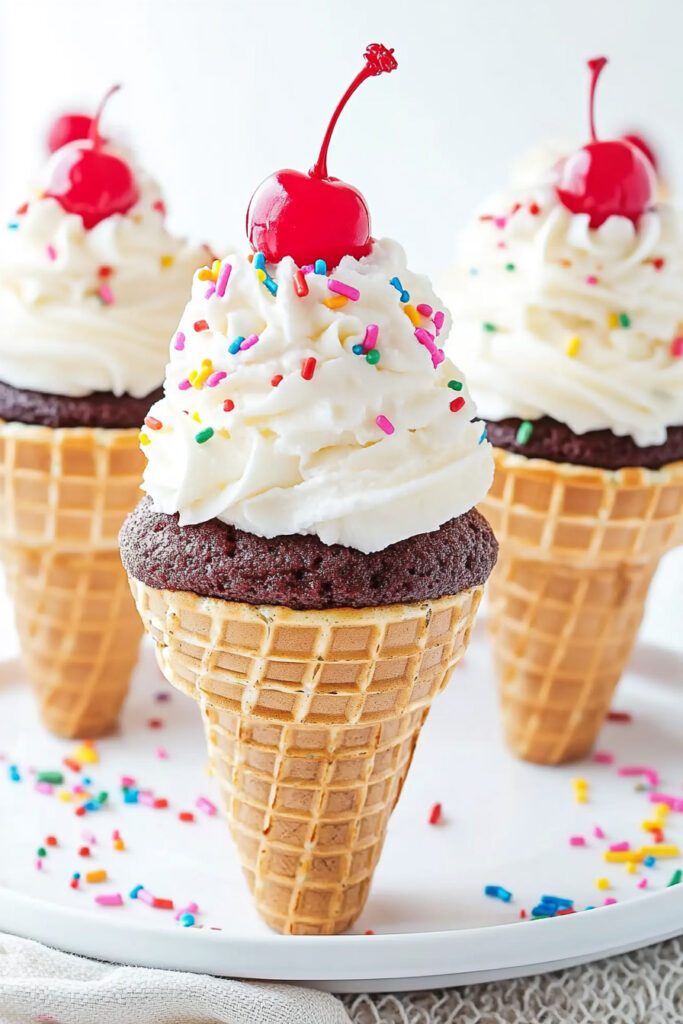
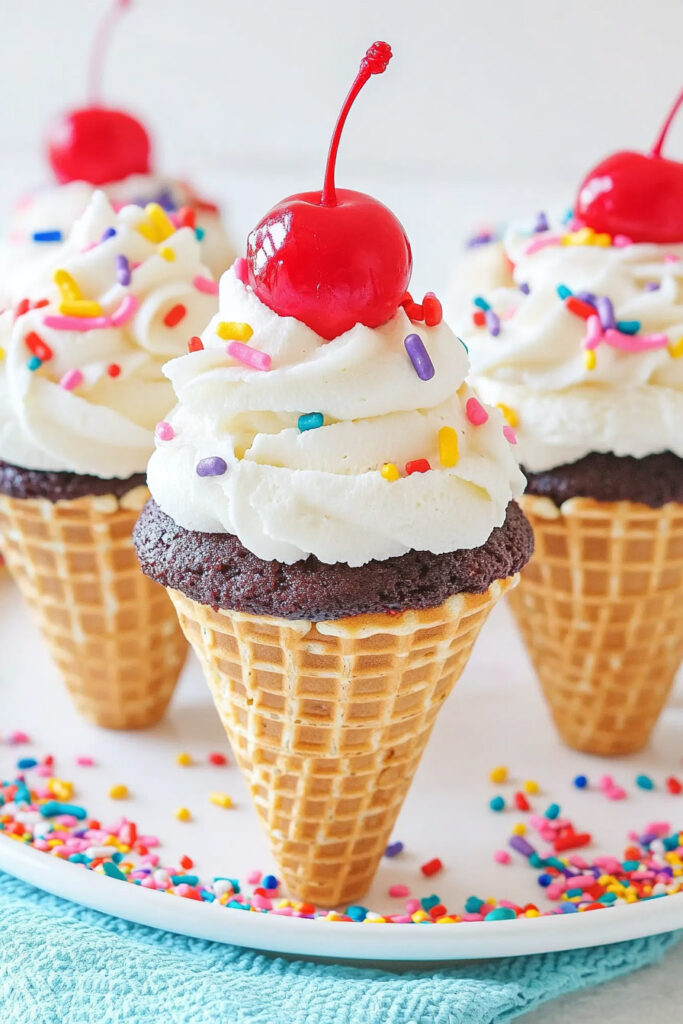
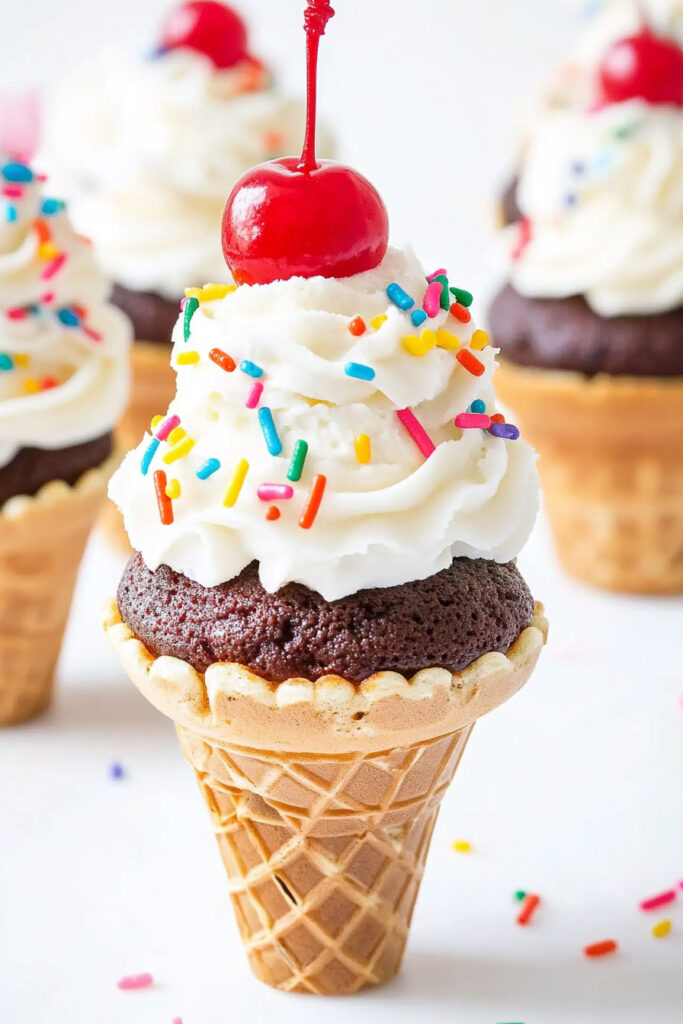
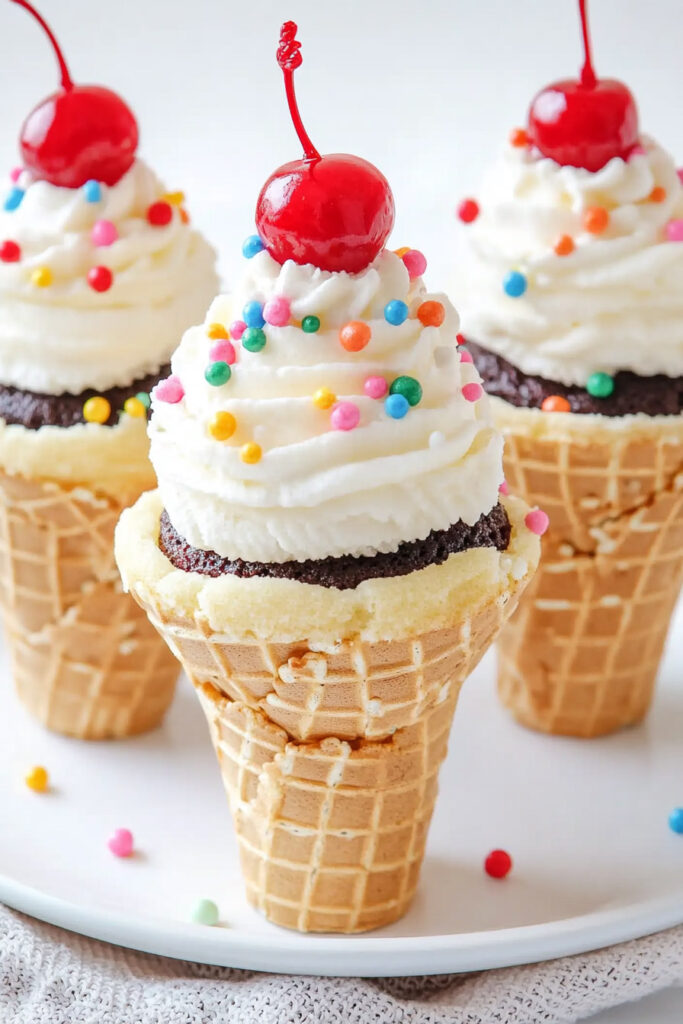
Transfer your frosting to a piping bag with a star tip (or snip the corner off a zip-top bag). Pipe swirls to mimic soft-serve ice cream. Don’t worry if it’s not perfect—homemade charm is the best.
7. Decorate & Serve
Add sprinkles and top with cherries if you’d like. Serve fresh or store in an airtight container until you’re ready to dig in.
Fun Ways to Customize
Want to mix things up? Here are some ideas:
Dietary Options:
- Go gluten-free or vegan by swapping out the cake mix and frosting for alternatives.
Flavor Twists:
- Try chocolate, strawberry, or even lemon cake mixes.
- Add cocoa powder or food coloring to your frosting for creative swirls.
Seasonal Spins:
- Fall vibes? Pumpkin spice cupcakes with cinnamon buttercream.
- Summer party? Coconut cake with pineapple frosting—yes, please!
Tips for Serving & Storing
- Presentation: Serve these on a platter with colorful napkins for extra flair.
- Storage: Keep unfrosted cupcakes at room temperature for 2 days, or in the fridge for up to 4 days.
- Freezing: Wrap unfrosted cupcakes tightly and freeze them for up to 3 months.
And that’s it—easy, right? Ice Cream Cone Cupcakes are guaranteed to bring smiles, whether you’re serving them at a party or just making them because they’re adorable (and delicious). If you try this recipe, let me know how it goes—I love hearing baking stories. Have fun and happy baking!