

Let’s talk tiramisu. You know it. You love it. This iconic Italian dessert, whose name means “pick me up,” is all about bold coffee flavor, creamy richness, and a touch of indulgence. But what if you could take those classic flavors and turn them into something a little more cool? Enter the Tiramisu Ice Cream Layer Cake—a frozen, no-bake treat that’s perfect for warm days, dinner parties, or when you just want to impress without breaking too much of a sweat.
This version blends everything you adore about tiramisu with the smooth, creamy texture of ice cream. And the best part? It’s as elegant as it is approachable. Ready to dive in? Here’s how to make it happen.

Recipe Basics
Total Time:
- Prep: 25 minutes
- Cook: 10 minutes (bain-marie)
- Freeze: At least 4 hours
Serves: 8 slices (but you can adjust as needed).
Skill Level: Intermediate. It’s not rocket science, but you’ll need to pay close attention to the details to get that texture just right.
You’ll Need:
- Heatproof bowl
- Saucepan (for bain-marie)
- Electric hand mixer (or good ol’ elbow grease and a whisk)
- Loaf pan (about 9.5x5x3 inches)
- Cling wrap
- Offset spatula
No loaf pan? No problem. Use any deep rectangular container lined with plastic wrap for easy removal.
Make Ahead Tip: This is your make-ahead hero. Assemble it the day before, freeze, and forget about it. Keeps well in the freezer for up to five days.
What You’ll Need
For the Coffee Syrup:
- ½ cup hot water
- 1–2 tbsp instant coffee (adjust for your caffeine craving)
- 2 tbsp caster sugar
- 2 tbsp liqueur (think Kahlúa, Amaretto, or Marsala)
Kid-friendly version? Skip the liqueur or swap for vanilla extract.
For the Mascarpone Ice Cream:
- 3 egg yolks
- ⅓ cup caster sugar
- 8 oz mascarpone cheese (softened but still cold)
- 1 cup heavy whipping cream
- ½ tsp vanilla extract
- 2 tbsp liqueur (optional)
- 1–2 tbsp instant coffee dissolved in 2 tbsp hot water
Pro Tip: Use the freshest eggs and high-quality mascarpone for the best flavor. No shortcuts here!
For Layering:
- 16 ladyfingers (store-bought or homemade)
- Cocoa powder (for that classic finish)
How to Make It
Step 1: Brew the Coffee Syrup
- Mix the hot water, instant coffee, sugar, and liqueur in a small bowl. Stir until everything’s dissolved.
- Let it cool completely. Nobody wants soggy ladyfingers, right?
Step 2: Whip Up the Mascarpone Ice Cream
- Cook the Egg Base: Whisk the egg yolks and sugar in a heatproof bowl. Place it over simmering water (bain-marie) and whisk nonstop until it thickens. You’re aiming for a smooth, pale yellow mixture. Take it off the heat and let it cool.
Test it: It’s ready when it ribbons off your whisk. - Whip the Cream: In a separate bowl, whip the heavy cream with vanilla until stiff peaks form.
- Mix It All Together: Soften the mascarpone in a large bowl (no lumps, please). Fold in the cooled egg mixture and liqueur. Finally, fold in the whipped cream for that fluffy texture. Split this mixture in half. Add the coffee to one half to make your coffee layer.
Step 3: Assemble the Cake
- Line a loaf pan with cling wrap, making sure there’s plenty hanging over the sides.
- Pour the vanilla mascarpone mixture into the pan as the first layer. Smooth it out, tap the pan to release air bubbles, and freeze for 30 minutes.
- Dip half the ladyfingers quickly in the coffee syrup (both sides) and layer them on top of the frozen vanilla layer.
- Add the coffee mascarpone mixture next. Smooth it out, tap the pan again, and freeze for 30 minutes.
- Dip the remaining ladyfingers in the syrup—this time, only on one side—and place them soaked-side down. Wrap the entire cake tightly in cling wrap and freeze for at least 4 hours (overnight is even better).
Step 4: Serve It Up
Take the cake out of the freezer. Use the overhanging cling wrap to lift it out of the pan. Dust the top with cocoa powder. Slice and serve!
Pro Tip: Warm your knife with hot water for those picture-perfect slices. Wipe it clean between cuts.
Fun Twists & Variations
Want to mix things up? Here are a few ideas:
- Gluten-Free: Use gluten-free ladyfingers or make your own.
- Alcohol-Free: Skip the liqueur entirely—flavor still shines through.
- Vegan Alternative: Swap mascarpone for cashew cream and heavy cream for coconut cream. Use aquafaba (chickpea liquid) to replace eggs.
Feeling Fancy?
- Sprinkle grated dark chocolate between the layers.
- Swap the cocoa powder for cinnamon for a warm, spiced twist.
- Experiment with flavored liqueurs like hazelnut (Frangelico) or orange (Grand Marnier).
Seasonal Touches: Add fresh berries like strawberries or raspberries for garnish in the summer.
Serving & Storage Tips
- Serve slices on chilled plates to keep them from melting. Want to go fancy? Garnish with chocolate curls or mint leaves.
- Pair it with a shot of espresso or a sweet dessert wine (like Vin Santo).
- Store leftovers wrapped tightly in the freezer for up to five days.
This Tiramisu Ice Cream Layer Cake isn’t just dessert—it’s an event. Creamy, cool, and packed with bold flavors, it’s one of those recipes that’ll leave your guests talking long after the plates are cleared. Try it out, and you’ll see what I mean.
PrintTiramisu Ice Cream Layer Cake
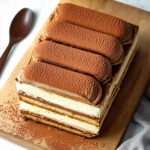
This Tiramisu Ice Cream Layer Cake is a no-bake, frozen version of the beloved Italian dessert. It combines coffee-soaked ladyfingers with creamy mascarpone ice cream in both vanilla and coffee flavors, topped with a dusting of cocoa powder. Perfect for warm days or special occasions, this dessert delivers all the classic tiramisu flavors in a refreshing, indulgent form.
- Prep Time: 25 minutes
- Cook Time: 10 minutes (bain-marie)
- Total Time: ~4 hours 35 minutes (including freezing)
- Yield: 8 1x
- Category: Dessert
- Cuisine: Italian
Ingredients
Coffee Syrup:
- ½ cup (120 ml) hot water
- 1–2 tbsp instant coffee
- 2 tbsp caster sugar
- 2 tbsp liqueur (e.g., Kahlúa, Amaretto, or Marsala)
Mascarpone Ice Cream:
- 3 egg yolks
- ⅓ cup (67 g) caster sugar
- 8 oz (225 g) mascarpone cheese, softened
- 1 cup (240 ml) heavy whipping cream
- ½ tsp vanilla extract
- 2 tbsp liqueur (optional)
- 1–2 tbsp instant coffee dissolved in 2 tbsp hot water
Assembly:
- 16 ladyfingers (savoiardi biscuits)
- Cocoa powder for dusting
Instructions
Step 1: Prepare Coffee Syrup
In a small bowl, mix hot water, instant coffee, caster sugar, and liqueur until dissolved. Let it cool completely before use.
Step 2: Make Mascarpone Ice Cream
- Cook Egg Mixture: Whisk egg yolks and sugar in a heatproof bowl. Place over simmering water (bain-marie) and whisk continuously until thickened and pale, reaching 154–160°F (68–70°C). Remove from heat and let cool slightly.
- Whip Cream: In a separate bowl, whip heavy cream with vanilla extract until stiff peaks form. Set aside.
- Combine Ingredients: Soften mascarpone in a large bowl. Gradually fold in the cooled egg mixture and liqueur until smooth. Gently fold in whipped cream in two batches to maintain airiness. Divide the mixture evenly into two bowls.
- Flavor Layers: Mix dissolved coffee into one bowl of the mascarpone mixture to create a coffee-flavored layer.
Step 3: Assemble the Cake
- Line a loaf pan with cling wrap, leaving overhang for easy removal.
- Pour the vanilla mascarpone mixture into the pan as the bottom layer. Smooth with an offset spatula and tap to remove air bubbles. Freeze for 30 minutes.
- Dip half of the ladyfingers briefly into coffee syrup and layer them over the frozen vanilla mixture.
- Add the coffee mascarpone mixture on top, smooth it out, and tap again to remove air bubbles.
- Dip remaining ladyfingers on one side only and place them soaked-side down over the coffee layer.
- Cover tightly with cling wrap and freeze for at least 4 hours or overnight.
Step 4: Serve
Remove from freezer and gently lift out using cling wrap overhang. Dust generously with cocoa powder before slicing.
Notes
Serving Suggestions: Serve chilled with a shot of espresso or dessert wine like Vin Santo for an authentic Italian pairing.
Tips & Tricks:
- Use high-quality mascarpone and fresh eggs for the best flavor and texture.
- Briefly dip ladyfingers into syrup to prevent them from becoming soggy.
- Warm your knife in hot water before slicing for clean cuts.
Storage & Reheating:
- Store tightly wrapped in the freezer for up to five days.
- No reheating required—serve directly from the freezer after letting it sit at room temperature for five minutes if too firm.