

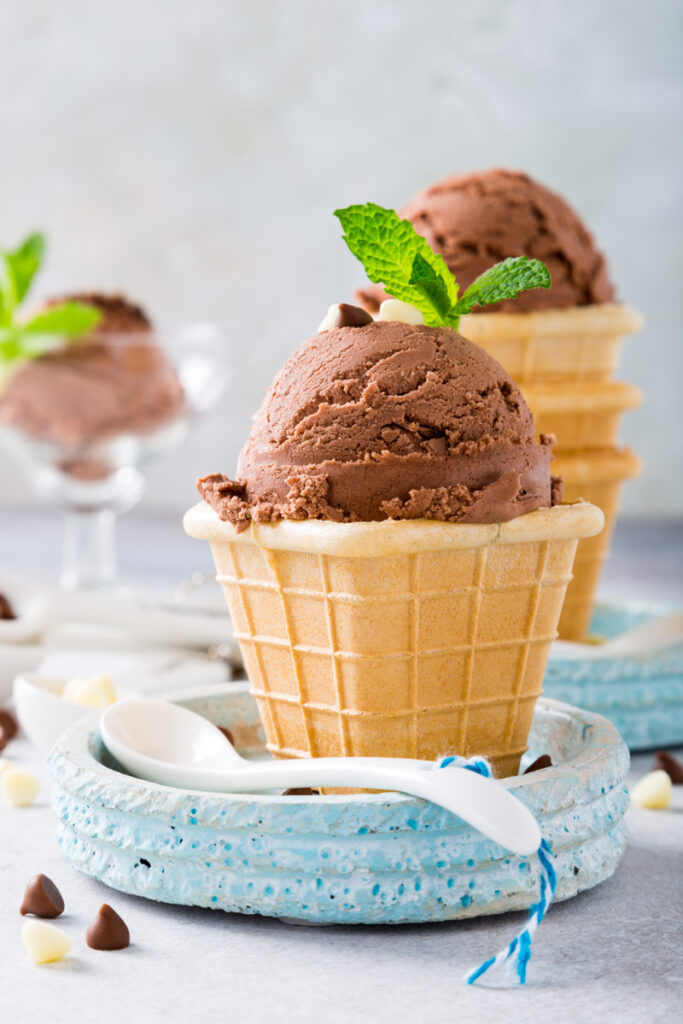
Hey there! So, what do we have here? Delicious Chocolate Ice Cream in Waffle Cups. Just look at those creamy scoops sitting like royalty in their crunchy golden “thrones.” It’s the perfect mix of smooth and crispy textures. Let me tell you how to recreate this beauty at home—no need to be a pro chef, just a little time and enthusiasm.
Here’s the lowdown:
- Think summer treats, but fancier. The kind that makes you feel like you’re at a quaint ice cream parlor without ever leaving your kitchen.
- Why stop at a bowl? Waffles make everything better. Especially when it’s holding chocolate heaven.
Now, let’s break this down piece by piece. Easy, fun, and totally worth it.
What’s Special About It?
Imagine this: You bite into the crisp, buttery waffle, and then boom—the rich, creamy chocolate hits you. A perfect balance.
And the best part? You get to eat the whole thing—no sticky bowls to clean up! It’s a dessert and dishware in one. Genius, right?
Quick Overview
- Prep Time: 15 minutes
- Cook Time: 20 minutes (for the waffle cups)
- Chill Time: 4 hours (the ice cream needs its beauty sleep)
- Servings: 6
Difficulty? Medium. But don’t let that scare you. I’ll guide you through each step.
What You’ll Need
Before jumping in, grab these essentials:
- An ice cream maker (or a freezer-safe container if you want to go no-churn).
- A waffle cone maker, or improv with your oven.
- A whisk, a saucepan, and something to shape your waffles (a small bowl works).
That’s it. Simple tools for a fancy-looking dessert.
Ingredients: The Stars of the Show
For the Ice Cream:
- Heavy Cream (2 cups): The backbone of anything creamy.
- Whole Milk (1 cup): Keeps it light but still rich enough.
- Sugar (¾ cup): Sweetness galore.
- Unsweetened Cocoa Powder (¾ cup): Go for a high-quality brand for that deep chocolate flavor.
- Egg Yolks (4): These thicken the base so it’s silky smooth.
- Vanilla Extract (1 tsp): A little goes a long way to enhance the chocolate.
Swaps: Can’t do dairy? Use coconut cream instead of heavy cream and almond milk instead of whole milk.
For the Waffle Cups:
- Eggs (1 large): Gives structure to your batter.
- Granulated Sugar (⅓ cup): Makes it sweet without overdoing it.
- Melted Butter (¼ cup): Buttery waffles? Yes, please.
- Vanilla Extract (½ tsp): Adds that nostalgic sweet scent.
- Flour (⅓ cup): Keeps the waffles light and just sturdy enough.
- Cornstarch (1 tbsp): Ensures crispy edges.
- Salt (a pinch): Balances the sweetness.
Fun Add-ons: Mint leaves and chocolate chips to decorate. Want more pizzazz? Add a drizzle of chocolate syrup or crushed nuts.
How to Make It: Step-By-Step

Step 1: Chocolate Ice Cream
- Heat heavy cream, milk, and sugar in a saucepan. Don’t boil it—just warm until the sugar melts. It should look smooth and glossy.
- Whisk your egg yolks in a bowl (they’ll look pale and slightly thick). Temper them by slowly adding some hot cream while whisking briskly. This keeps the eggs from scrambling.
- Pour the yolk mixture back into the saucepan. Cook on low heat until it thickens. It’s ready when it coats the back of a spoon.
- Stir in cocoa powder and vanilla. Strain everything into a bowl (no lumps allowed) and chill for 2 hours.
- Churn in an ice cream maker, or if you’re doing it old-school, freeze it and stir every 30 minutes until it’s creamy.
Pro Tip: If you smell a strong chocolatey aroma, you’re on the right track. And no boiling the custard—it’ll ruin everything.
Step 2: Waffle Cups
- Preheat your waffle cone maker. If you don’t have one, preheat your oven to 350°F.
- Whisk the egg and sugar until frothy. Stir in melted butter and vanilla.
- Sift in the flour, cornstarch, and salt. Fold gently until you get a smooth batter.
- If using a waffle maker, drop a spoonful of batter, close the lid, and cook for 1–2 minutes. Quickly shape the waffle over a small bowl. Let it cool and harden.
- If baking, spread the batter thinly on parchment paper and bake for 5–7 minutes. Shape while it’s warm.
Step 3: Assembly
Time to shine!
- Place a scoop of ice cream into each waffle cup.
- Garnish with mint leaves and chocolate chips for that polished dessert vibe.
- Serve immediately. Trust me, they won’t last long.

Make It Your Own
- Gluten-Free: Swap all-purpose flour with your favorite gluten-free blend.
- Vegan: Use coconut milk/cream and egg substitutes. Bonus: Vegan chocolate ice cream is divine!
- Add a Twist: Sprinkle cinnamon in the ice cream base for a Mexican chocolate vibe. Or toss in mini marshmallows to make it s’mores-inspired.

Storing Leftovers
- Waffle cups: Store in an airtight container at room temperature for up to 3 days.
- Ice cream: Keep in a freezer-safe container for up to a week. Just let it sit out for a few minutes before scooping.
Pro Tip: If your waffles lose their crunch, pop them in a low oven for a few minutes to crisp them back up.
This dessert is simple enough for a casual weekend but impressive enough for special occasions. And the best part? You made it all by hand. When your friends and family dig in, they’ll think you spent hours on it (when really, you just followed these easy steps).
So, go ahead. Treat yourself to this chocolatey, crispy, creamy indulgence. You deserve it!