

Picture this: a fudgy brownie base, creamy cookies-and-cream ice cream in the middle, and crunchy Oreo pieces on top. Sound amazing? That’s exactly what this Brownie Oreo Ice Cream Cake is all about. It’s easy to make, perfect for any celebration, and, honestly, just an excuse to treat yourself. Whether it’s a birthday, a summer BBQ, or a “just because” moment, this cake brings the fun and the flavor. Let’s create something truly delicious together!

What to Know Before You Start
- Total Time Needed:
- Prep: 20 minutes
- Baking: 25 minutes (for the brownie base)
- Freezing: 6–8 hours (or overnight—it’s worth it!)
- Total: 7–9 hours
- How Many Does It Serve?
12 generous slices (or more if you cut it smaller). - Skill Level:
Beginner-friendly. If you can bake brownies and layer stuff, you’re golden. - What You’ll Need:
- 9×13 baking dish (or a springform pan if you want to be fancy)
- Mixing bowl
- Spatula
- Sharp knife (for slicing ice cream)
- Aluminum foil or plastic wrap for covering
Ingredients List: Keep It Simple
For the Brownie Layer:
- 1 box of brownie mix (follow the instructions for a 9×13 pan)
For the Ice Cream Layer:
- 1 (1.5-liter) container cookies-and-cream ice cream (let it soften slightly for easy spreading)
For the Crunchy Oreo Layer:
- 24 Oreos, roughly chopped (save half a cup for sprinkling on top)
Toppings:
- Drizzle of chocolate syrup
- 1 tub of Cool Whip (thawed)
Quick Tip: Want to make it your own? Use your favorite ice cream flavor or swap Cool Whip with homemade whipped cream.
How to Make It Step-by-Step
Step 1: Bake the Brownies
Whip up the boxed brownie mix and bake it in a greased or parchment-lined pan. Once baked, let the brownies cool completely—this is super important so the ice cream doesn’t melt when you add it.
Pro Tip: Want an extra fudgy base? Pull the brownies out of the oven 2–3 minutes early.
Step 2: Sprinkle on the Oreos
Chop the Oreos into bite-sized pieces and spread them across the brownie layer. Save a little for later—trust me, you’ll want that for garnish. Drizzle a generous amount of chocolate syrup over the Oreos. But don’t go overboard; just enough to coat them lightly.
Step 3: Add the Ice Cream
Take the softened ice cream and slice it into thick chunks (about an inch thick works great). Lay the slices across the Oreo layer, covering the brownie base as evenly as you can. Use a spatula or your hands (wearing a plastic bag for less mess) to press and smooth the ice cream layer.
Pro Tip: Work quickly so the ice cream doesn’t melt too much while you’re spreading it.
Step 4: Top It Off
Spread a layer of Cool Whip across the ice cream. Smooth it out for that finished, bakery-style look. If you’ve got an offset spatula, dip it in warm water to get those edges looking clean.
Step 5: Garnish and Freeze
Here’s where it all comes together. Sprinkle the rest of the chopped Oreos on top and add a bit more chocolate syrup for flair. Cover the whole pan tightly with foil or plastic wrap and pop it in the freezer for at least 6–8 hours (or better yet, overnight).
Don’t Skip This: Covering the cake is crucial—it keeps the ice cream fresh and prevents freezer burn.
Fun Ways to Customize
Diet-Friendly Swaps:
- Use a gluten-free brownie mix and dairy-free ice cream to make it gluten-free or vegan.
Change the Flavors:
- Want something different? Swap Oreos for peanut butter cups or drizzle caramel instead of chocolate syrup.
Seasonal Additions:
- Crushed peppermint candies for the holidays. Fresh berries for summer. Endless possibilities.
Feeling Fancy?:
- Add a layer of ganache between the components for a restaurant-worthy dessert.
Serving and Storing Tips
How to Serve:
Use a sharp knife warmed under hot water for clean slices. Serve on chilled plates to keep the cake from melting too fast. Want to dress it up? Add fresh fruit or a dollop of extra whipped cream on the side.
Storing Leftovers:
Wrap the cake tightly and store it in the freezer for up to a week. Before serving leftovers, let the slices thaw for about 5–10 minutes so they soften up just enough.
Make It Ahead:
This dessert is a lifesaver when entertaining. Assemble it up to two days ahead, keep it frozen, and it’s ready whenever you need it.
Why You’ll Love It
This cake isn’t just any dessert—it’s a mix of everything you love: chewy brownies, creamy ice cream, and crunchy Oreos. Whether it’s a birthday, a hot summer day, or just a random Tuesday dessert, it’s guaranteed to bring smiles. So grab your ingredients, roll up your sleeves, and let’s get baking (and freezing)!
PrintBrownie Oreo Ice Cream Cake
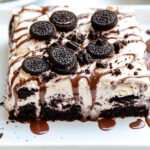
This Brownie Oreo Ice Cream Cake is a show-stopping dessert that layers fudgy brownies, creamy cookies-and-cream ice cream, crushed Oreos, and fluffy Cool Whip. Perfect for celebrations or just treating yourself, it’s easy to make and irresistibly delicious!
- Prep Time: 20 minutes
- Cook Time: 25 minutes
- Total Time: 7–9 hours (includes freezing)
- Yield: 12 1x
- Category: Dessert
- Cuisine: American
Ingredients
- 1 (18.3 oz) brownie mix, prepared as directed in a 9×13 dish
- 1 (1.5-liter) container cookies-and-cream ice cream (softened slightly)
- 24 Oreos, roughly chopped (reserve ½ cup for garnish)
- Hershey’s Chocolate Syrup (for drizzling)
- 1 (8 oz) container Cool Whip (thawed)
Instructions
- Prepare the Brownie Base: Bake the brownie mix as per package instructions in a greased or parchment-lined 9×13 dish. Let it cool completely.
- Add the Oreo Layer: Sprinkle chopped Oreos evenly over the brownies, reserving some for garnish. Drizzle generously with chocolate syrup.
- Layer the Ice Cream: Slice the softened ice cream into thick pieces and arrange over the Oreo layer. Use a spatula or plastic bag to press and smooth it into an even layer.
- Top with Cool Whip: Spread Cool Whip evenly over the ice cream layer for a creamy finish.
- Garnish and Freeze: Sprinkle the reserved Oreos on top and drizzle with more chocolate syrup if desired. Cover tightly with foil or plastic wrap and freeze for at least 6–8 hours, preferably overnight.
- Serve: Let the cake sit at room temperature for 5–10 minutes before slicing with a warm knife for clean cuts.
Notes
- Serving Suggestions: Serve chilled with extra chocolate syrup or fresh berries for added flair.
- Tips & Tricks: Work quickly when layering the ice cream to prevent melting, and always cover tightly to avoid freezer burn. Use a springform pan if you want easier removal and presentation.
- Storage & Reheating: Store leftovers in an airtight container in the freezer for up to one week. Let slices soften at room temperature for a few minutes before serving.