

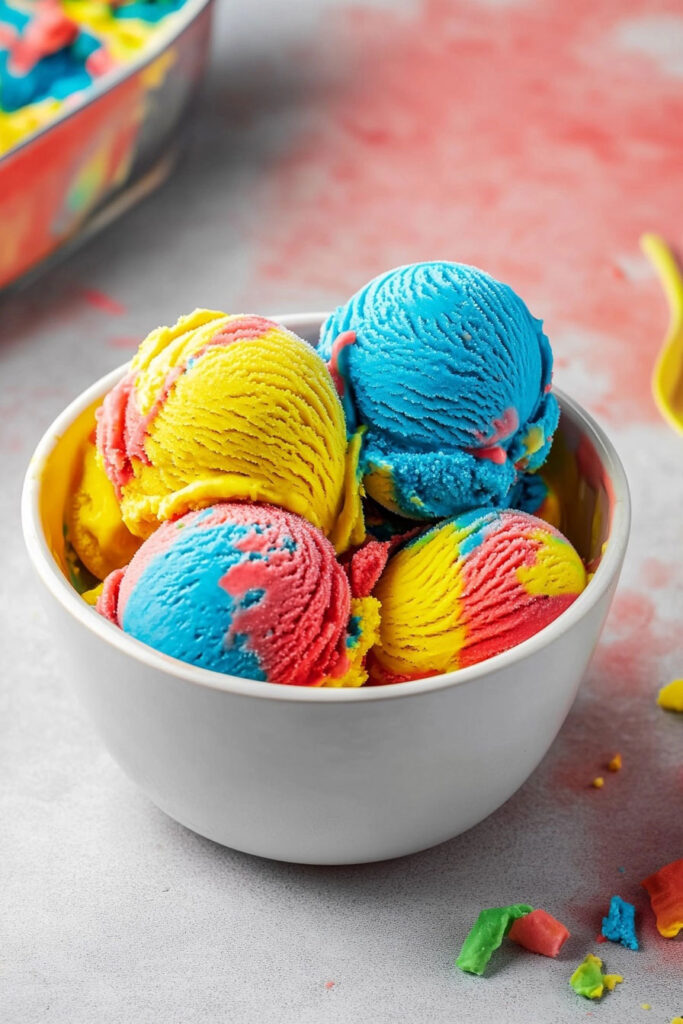
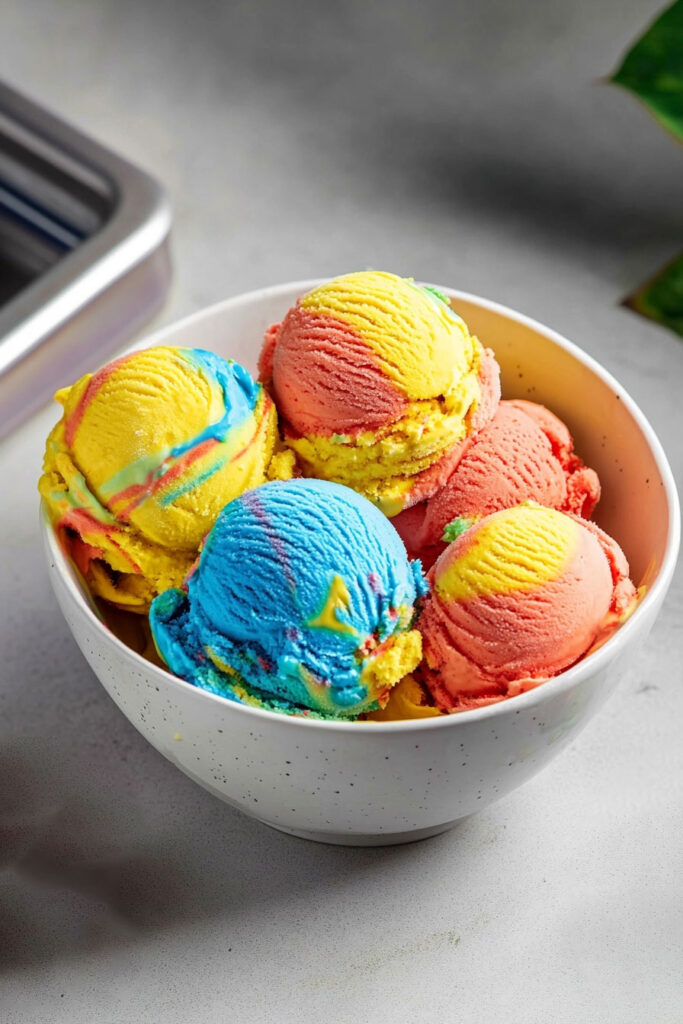
Superman Ice Cream isn’t just a dessert—it’s a memory you can hold in your hands. With its bright red, yellow, and blue swirls, it’s as fun to look at as it is to eat. Believe it or not, this colorful creation is thought to have first popped up in Michigan during the Prohibition era, courtesy of Stroh’s Brewery. Over time, it has become a Midwest classic, loved by kids and adults alike.
The name and colors give a nod to the superhero’s costume, but here’s the fun part: the flavors? They vary depending on who’s making it. If you’re ready to relive childhood memories or try something new, this no-churn recipe brings all the magic—no ice cream maker needed!
Recipe Snapshot
Here’s what to know right off the bat:
- Prep Time: 10 minutes
- Freezing Time: 4 hours
- Total Time: Just over 4 hours
- Servings: 16
- Difficulty: Beginner-friendly!
This recipe is great for parties, family time, or simply treating yourself. You can halve it for smaller servings or double it for a crowd. No ice cream maker? No problem. All you need is a few simple tools and a little patience while it freezes.
What You’ll Need:
- Large mixing bowl
- Electric mixer (or a hand whisk if you’re feeling ambitious)
- Three small bowls (for the colors)
- A loaf pan or any airtight container
- Plastic wrap or a lid
Quick Tip: No electric mixer? A whisk works too, but be ready for an arm workout!
Ingredients
What’s in It:
- 2 cups cold heavy whipping cream – For that dreamy, creamy texture.
- 1 (14-ounce) can sweetened condensed milk – Adds the perfect sweetness.
- 1 teaspoon vanilla extract – Just a little something to tie it all together.
- Blue, yellow, and red gel food coloring – For those signature vibrant swirls!
Want to Get Creative?
- Swap the vanilla extract for almond, lemon, or bubblegum for a fun twist.
- Prefer natural options? Use dye-free food coloring.
- Vegan Alternative: Coconut cream and sweetened coconut milk do the trick.
Pro Tip: Chill your whipping cream and condensed milk beforehand. It makes whipping easier and keeps the mixture light and fluffy.

How to Make It
Step 1: Whip It Up
Pour the cold heavy cream into a large bowl. Beat it on high speed until stiff peaks form—it’s ready when it holds its shape. Don’t overdo it, though! You want fluffy, not grainy.
Step 2: Make the Base
In a separate bowl, mix together the sweetened condensed milk and vanilla extract. Once it’s smooth, gently fold this into the whipped cream. Be careful not to lose that airy texture—it’s what makes the ice cream creamy.
Step 3: Divide and Color
Split the mixture evenly into three bowls. Add a few drops of blue food coloring to one, yellow to another, and red to the last. Give each bowl a gentle stir until the color is vibrant and even.
Pro Tip: Gel food coloring works best—bright colors without messing up the texture.
Step 4: Layer and Swirl
Spoon the colored mixtures into a loaf pan (or container) in random dollops. Alternate the colors, then grab a knife and swirl through the top to create that marbled effect. Don’t overmix, though—the swirls are part of the charm.
Step 5: Freeze
Cover the container with plastic wrap or a lid, and pop it in the freezer for at least 4 hours—or overnight if you can wait. You’ll know it’s ready when it’s firm enough to scoop.
Make It Your Own
Here’s where you can get creative:
Dietary Swaps:
- Go vegan with coconut cream and sweetened coconut milk.
- Want less sugar? Use a sugar-free condensed milk option.
Flavor Fun:
- Blue swirl? Try blueberry or blue raspberry extract.
- Yellow? Lemon or banana.
- Red? Strawberry or cherry.
Add-Ins:
- Toss in mini marshmallows, sprinkles, or chocolate chips for extra flair.
- Hosting a spring gathering? Try pastel colors. Making it for summer? Go bold!
Serving and Storing
How to Serve:
Scoop it into colorful cones or bowls. Want to dress it up? Add whipped cream, sprinkles, or even edible glitter for some sparkle.
Pair It With:
- Sugar cookies
- Fresh fruit, like strawberries or blueberries
Storing Tips:
Store leftovers in an airtight container at the back of your freezer to keep it as fresh as possible. Press plastic wrap directly onto the surface before sealing to avoid freezer burn.
Need to Soften It? Let it sit at room temperature for 5 minutes before scooping.
Superman Ice Cream isn’t just about the taste—it’s about the memories you make while eating it. Bright colors, delicious swirls, and a playful vibe make it the perfect treat for kids, parties, or anyone who’s young at heart. So, grab your mixing bowl, whip up some fun, and enjoy every colorful bite!