

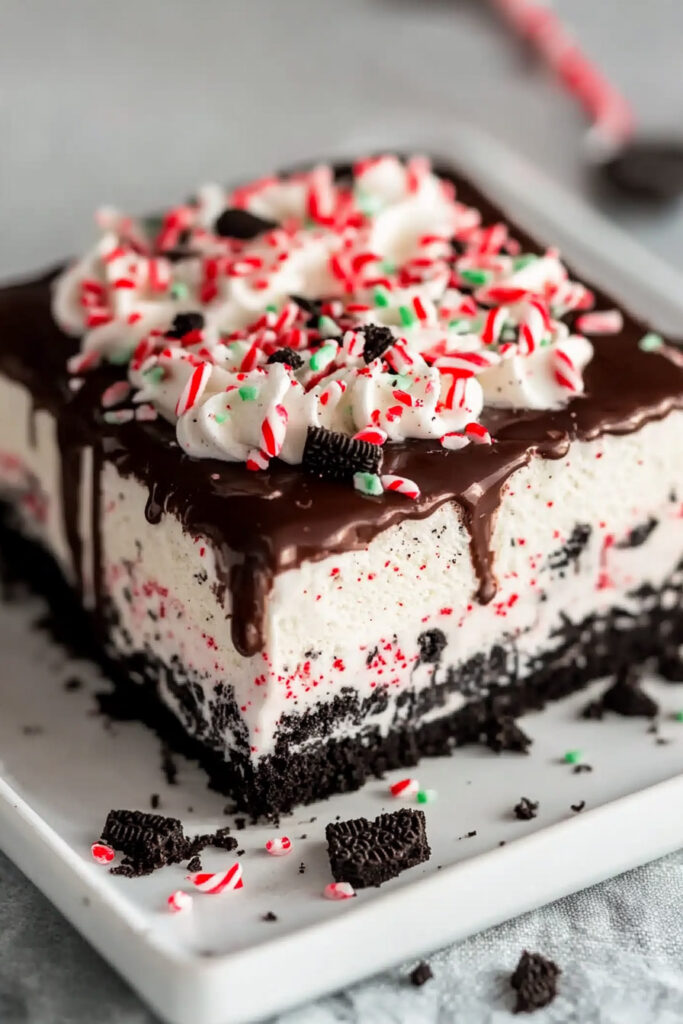
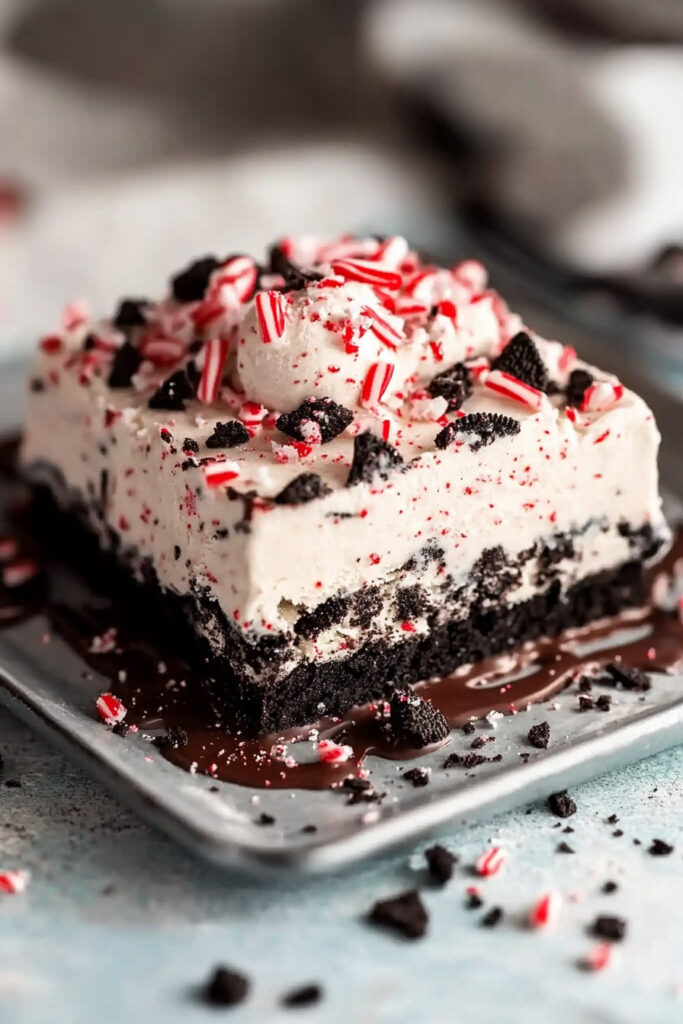
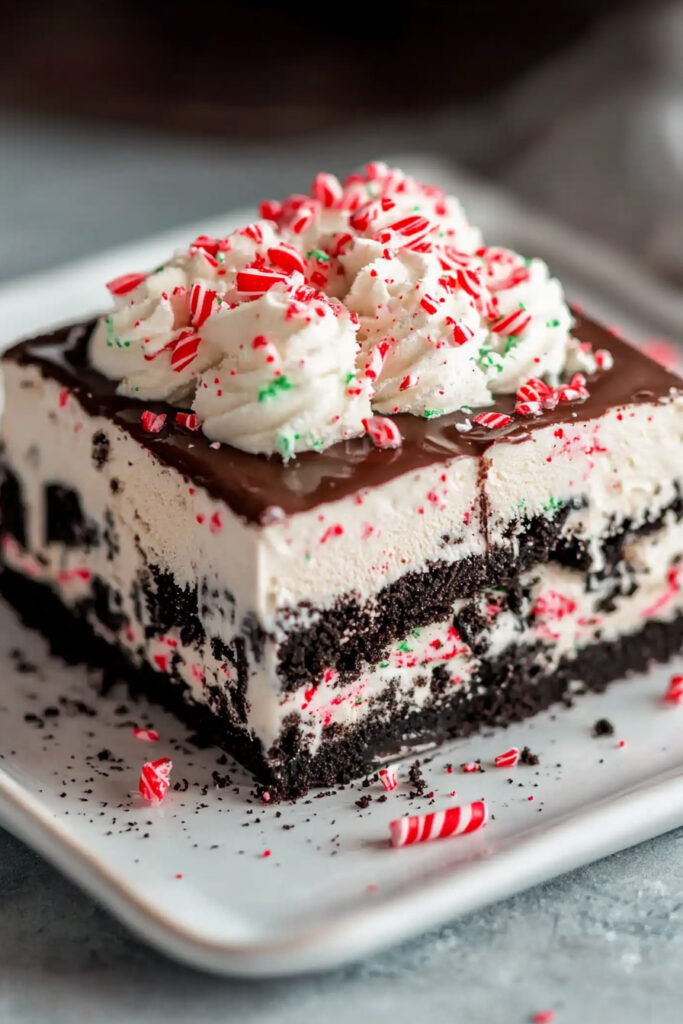
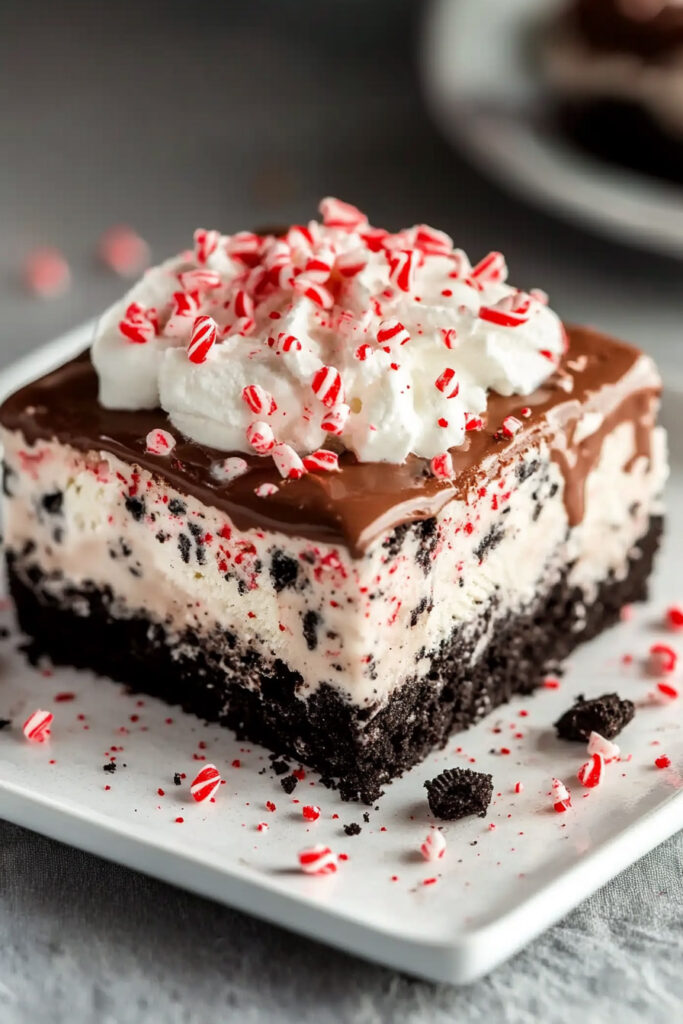
Who doesn’t love a no-bake dessert that screams “holiday cheer” without all the stress? This Peppermint Oreo Ice Cream Cake blends the cool bite of peppermint, the creamy indulgence of ice cream, and the satisfying crunch of Oreos. It’s as festive as a plate of Christmas cookies but way easier to whip up. Bonus? It’s a total crowd-pleaser—for both kids and adults.
Believe me, this cake is the dessert equivalent of a holiday hug. Layers of candy cane ice cream, hot fudge, and whipped cream come together to create pure magic. And the best part? You don’t need to be a professional baker to pull it off.
Quick Recipe Snapshot
Here’s what you need to know before diving in:
- Prep Time: 20 minutes
- Chill Time: 4 hours (overnight is even better)
- Servings: 15 generous slices
- Difficulty: So easy, even non-cooks can nail it!
- Equipment:
- Food processor (or a rolling pin if you’re old-school)
- 9×13-inch baking dish
- Microwave (to warm up fudge)
Pro Tip: Make this the day before your party. It slices up like a dream when it’s fully frozen.

Ingredients You’ll Need
Here’s your shopping list:
- Oreos (14 oz package): For the crust and topping. Love another chocolate cookie? Swap it in.
- Butter (6 tablespoons, melted): To hold that crust together.
- Candy Cane Ice Cream (48 oz): Let it soften a bit for easy spreading. Regular peppermint ice cream works too.
- Hot Fudge Sauce (16 oz jar): Warm it up so it’s nice and drizzle-y. Chocolate syrup? Great sub.
- Cool Whip (8 oz): For that fluffy top layer. Want to level up? Use homemade whipped cream.
- Crushed Candy Canes: Sprinkle these on top for the most festive vibes.
- Optional: More fudge or chocolate syrup for serving. More is always better.
Ingredient Hack: Pick a high-quality ice cream. It makes all the difference.
Step-by-Step Instructions
1. Make the Crust
Crush the Oreos into fine crumbs using a food processor. No processor? Toss the cookies in a zip bag and crush them with a rolling pin. Reserve a few tablespoons of crumbs for topping later. Mix the rest with melted butter, then press the mixture tightly into a 9×13-inch pan.
Pro Tip: Stick the crust in the freezer for 15 minutes—this makes it sturdier when adding the ice cream.
2. Add the Ice Cream Layer
Let the ice cream sit out for about 30 minutes. You want it soft enough to spread but not melted. Use a spatula to smooth it over the chilled crust.
Watch Out For: Melting ice cream can get messy fast. Keep an eye on it!
3. Drizzle Hot Fudge
Microwave the fudge for 20–30 seconds so it’s pourable but not too runny. Drizzle it all over the ice cream, then spread it out gently.
Hot Tip: Cold fudge won’t spread well. Don’t skip the warming step!
4. Add Cool Whip
Spread a fluffy layer of Cool Whip over the fudge. It’s the perfect creamy finish.
5. Decorate
Sprinkle the top with crushed Oreos and candy canes. Instant holiday magic!
6. Freeze
Cover the dish with foil or plastic wrap and freeze for at least 4 hours. Overnight is best if you can wait that long.
7. Serve
Let the cake sit at room temp for 10–15 minutes before slicing. Use a sharp knife warmed with hot water (and wiped dry). Drizzle each slice with more fudge if you’re feeling fancy.
Ways to Customize
- Gluten-Free: Use gluten-free sandwich cookies.
- Vegan: Swap to dairy-free ice cream and whipped topping.
- Extra Peppermint: Add crushed Andes mints or peppermint bark between layers.
- Year-Round Twist: Prefer chocolate or vanilla ice cream? Go for it!
Serving & Storage
Serving Tip: Pair this cake with hot cocoa or coffee. Sprinkle extra candy canes on each slice for a little wow factor.
Leftovers: Cover tightly and keep in the freezer for up to a week. Just make sure it’s well-wrapped to avoid freezer burn.
Make-Ahead: Prep this cake up to 2 days before your event. It’ll stay perfect in the freezer.
This Peppermint Oreo Ice Cream Cake is a guaranteed hit at any holiday party. It’s festive, easy, and downright delicious. Whether it’s Christmas dinner with the family or a last-minute potluck dessert, this is the kind of recipe that makes everyone think you worked way harder than you did. Try it—you’ll thank me later!
PrintPeppermint Oreo Ice Cream Cake

This Peppermint Oreo Ice Cream Cake is a no-bake, festive dessert that combines the refreshing coolness of peppermint with the rich creaminess of ice cream and the crunch of Oreos. Perfect for holiday gatherings or any time you want to impress with minimal effort, this cake is as easy to make as it is delicious.
- Prep Time: 20 minutes
- Cook Time: None
- Total Time: 4 hours 20 minutes (4 hours or overnight)
- Yield: 15 slices 1x
- Category: Dessert
- Cuisine: American
Ingredients
- 1 (14.3 oz) package Oreos, plus extra for topping
- 6 tablespoons butter, melted
- 1 (48 oz) carton candy cane ice cream, softened (peppermint ice cream works too)
- 1 (16 oz) jar hot fudge, warmed for drizzling
- 1 (8 oz) tub Cool Whip (or whipped cream)
- Crushed candy canes for garnish
- Optional: Additional hot fudge or chocolate syrup for serving
Instructions
- Prepare the Crust: Crush the Oreos into fine crumbs using a food processor or by placing them in a zip-top bag and crushing with a rolling pin. Reserve 3 tablespoons of crumbs for garnish. Mix the remaining crumbs with melted butter until combined. Press this mixture firmly into a greased 9×13-inch baking dish to form the crust.
- Add Ice Cream Layer: Allow the candy cane ice cream to soften at room temperature for about 30 minutes. Spread the softened ice cream evenly over the Oreo crust using a spatula.
- Drizzle Hot Fudge: Microwave the hot fudge for about 30 seconds or until it reaches a pourable consistency. Drizzle it generously over the ice cream layer and spread evenly with a spoon or spatula.
- Top with Cool Whip: Spread an even layer of Cool Whip over the hot fudge layer, creating a fluffy and creamy top.
- Garnish: Sprinkle reserved Oreo crumbs and crushed candy canes over the Cool Whip layer for a festive touch.
- Freeze: Cover the dish tightly with plastic wrap or foil and freeze for at least 4 hours, preferably overnight, to allow the layers to set completely.
- Serve: Remove from the freezer about 10–15 minutes before serving to soften slightly. Cut into squares using a sharp knife warmed under hot water (wipe dry between cuts). Drizzle with additional hot fudge if desired.
Notes
Serving Suggestions:
This cake pairs wonderfully with hot cocoa or coffee during holiday celebrations. For an extra-special presentation, garnish each slice with whipped cream and a peppermint stick.
Tips & Tricks:
- Use high-quality ice cream for better flavor and texture.
- Let the ice cream soften just enough to spread easily but avoid letting it melt completely.
- Chill the Oreo crust in the freezer for 10–15 minutes before adding the ice cream layer to ensure stability.
Storage & Reheating Instructions:
Store leftovers tightly covered in the freezer for up to one week. To serve again, let sit at room temperature for about 10–15 minutes before slicing. This dessert does not require reheating but should be kept frozen at all times when not being served.