

Tiramisu lovers, this one’s for you. Imagine combining the creamy, coffee-kissed goodness of tiramisu with the cool, refreshing delight of homemade ice cream. Sounds dreamy, right? This recipe brings those classic Italian flavors—coffee, cocoa, mascarpone—and turns them into a dessert that’s smooth, decadent, and so hard to resist. And the best part? Your trusty Cuisinart ice cream maker will do most of the heavy lifting. Perfect for dinner parties or just treating yourself after a long day.
Let’s dive in.
Quick Recipe Rundown
- Prep Time: 30 minutes
- Cook Time: 10 minutes
- Freezing Time: 4–6 hours
- Makes: About 1 quart (serves 4–6 people)
Feeling ambitious? You can double the recipe—just make sure your ice cream maker can handle the extra volume.
- Skill Level: Intermediate. You’ll be making a custard base, so temperature control is key (don’t worry—I’ve got tips for you!).
- Make Ahead Options: The ice cream base and mocha ripple can both be prepped a day ahead.
What You’ll Need
Gear:
- Ice cream maker (Cuisinart or any brand works)
- Medium saucepan
- Mixing bowls
- Whisk and wooden spoon
- Fine mesh strainer
- Freezer-safe container (airtight, please!)
Ingredients
For the Tiramisu Ice Cream:
- Heavy cream: 2 cups (16 oz) – Use the good stuff for that rich, silky texture.
- Whole milk: 1¼ cups (10 oz) – Full-fat is best.
- Granulated sugar: ⅓ cup + 1 tablespoon (about 75g).
- Egg yolks: 3 – Let them come to room temp for easier mixing.
- Salt: Just a pinch—it makes all the flavors pop.
- Kahlua or coffee liqueur: 3 tablespoons. Don’t drink? Use some strong brewed espresso instead.
- Dark rum: 2 tablespoons (totally optional but adds depth).
For the Mocha Ripple:
- Granulated sugar: 5 teaspoons.
- Agave syrup: 2¼ teaspoons (or swap in honey or corn syrup).
- Espresso: 2 tablespoons. Fresh-brewed or instant works—whatever you have on hand.
- Cocoa powder: 2 tablespoons + 2 teaspoons. Go for unsweetened!
Let’s Make Some Magic
Step 1: The Ice Cream Base
Heat it up: Combine the cream, milk, and sugar in a medium saucepan. Warm it over medium heat until you see little bubbles around the edge—don’t let it boil! Take it off the heat and let it cool for 5 minutes.
- Visual tip: The mix should look smooth and slightly frothy.
Whisk the eggs: In a bowl, whisk the egg yolks and salt until pale yellow and a bit thickened. Now, slowly pour the warm milk mixture into the yolks, whisking constantly so the eggs don’t scramble.
Cook the custard: Pour everything back into the pan and heat it over low-medium. Stir consistently until it thickens slightly and hits 185°F (use a thermometer if you can). Don’t let it boil! You’re going for silky, not scrambled.
- Pro Tip: Drag your finger along the back of a wooden spoon coated with the custard. If it leaves a clean line, you’re there!
Cool it down: Strain your custard into a clean bowl over an ice bath. Once cool, pop it in the fridge for at least 2 hours (or overnight). When you’re ready, stir in the Kahlua and rum (or coffee).
Step 2: The Mocha Ripple
- Mix it up: Combine the sugar, agave syrup, espresso, and cocoa powder in a small saucepan. Heat over medium until bubbly, then lower the heat and cook for another minute.
- The goal? A thick but pourable sauce.
- Cool completely. Store in the fridge if you’re not using it right away (it keeps for two weeks!).
Step 3: Churn and Swirl
Churn: Pour the chilled custard into your pre-frozen ice cream maker and churn according to the instructions (usually 20–25 minutes). It should look like soft serve when it’s done.
- Pro Tip: Ensure your mixture and ice cream bowl are cold. Room temp won’t cut it.
Layer and swirl: Scoop half your ice cream into a freezer-safe container, drizzle half the mocha ripple on top, then repeat with the rest. Grab a knife and gently swirl it all together—don’t overdo it!
Cover the container and freeze for 4–6 hours until firm.
Customize It Your Way
- Dairy-Free? Swap the cream and milk for coconut cream and almond milk. The texture will be a little different, but still delicious.
- Feeling festive? Add a sprinkle of cinnamon or nutmeg to the mocha ripple—perfect for the holidays.
- Want to go fancy? Layer crushed, coffee-soaked ladyfingers between your ice cream and mocha swirls for a true tiramisu vibe.
Serving Tips
- Let the ice cream rest at room temp for 5–10 minutes to soften before scooping.
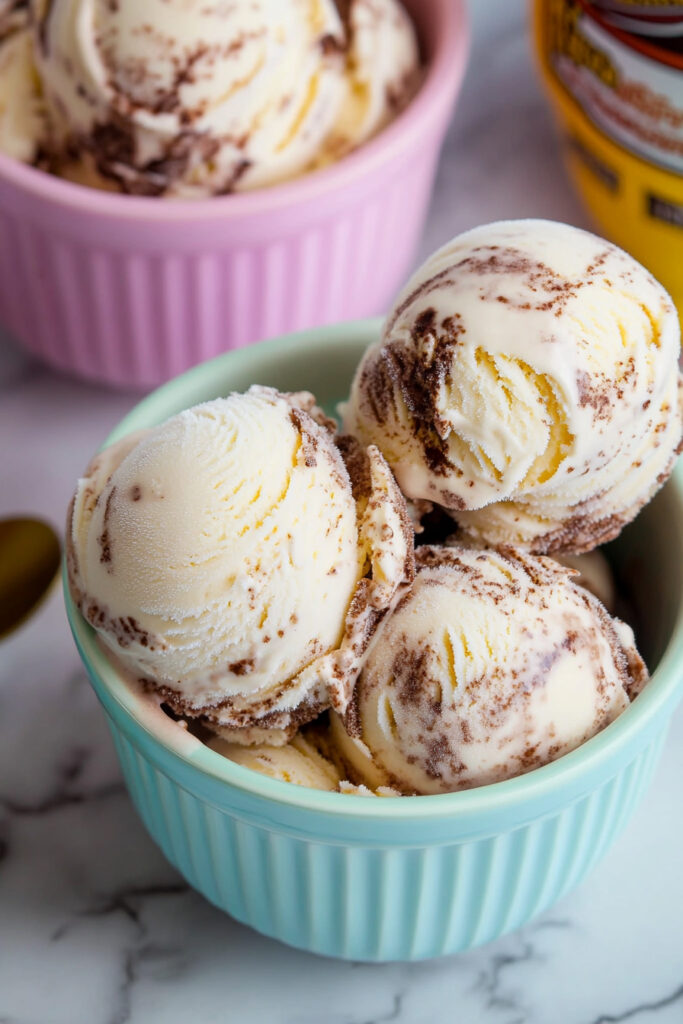
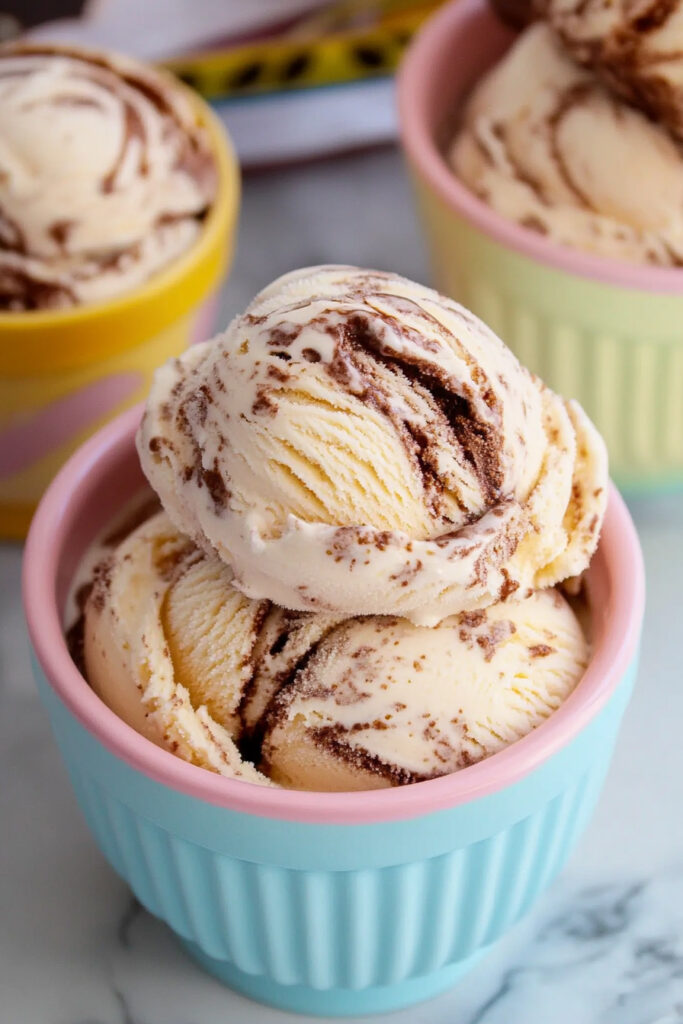
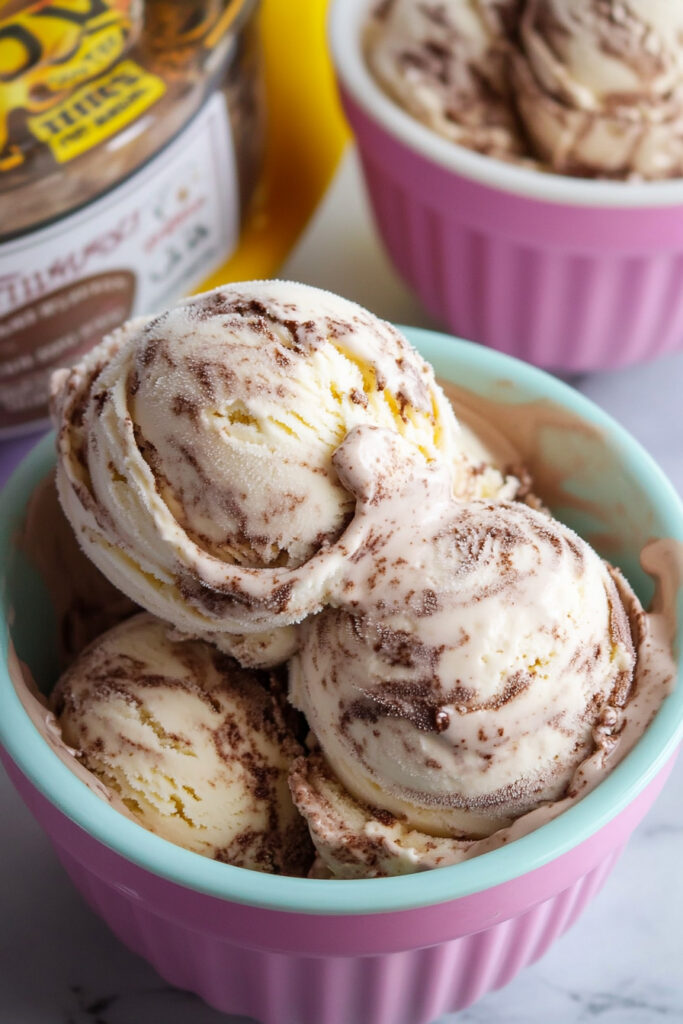
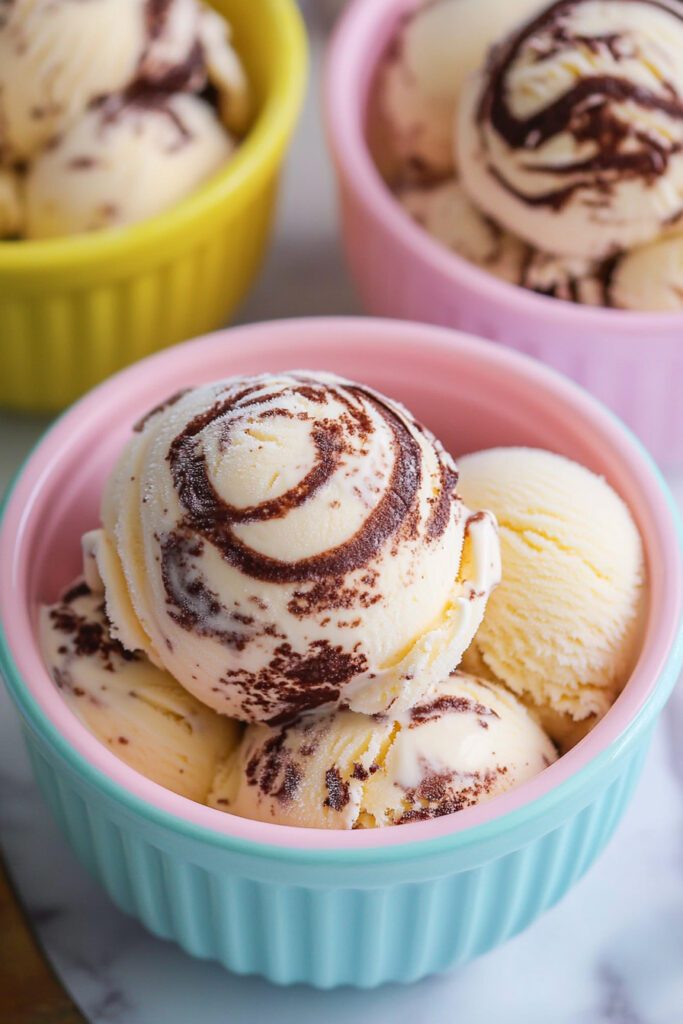
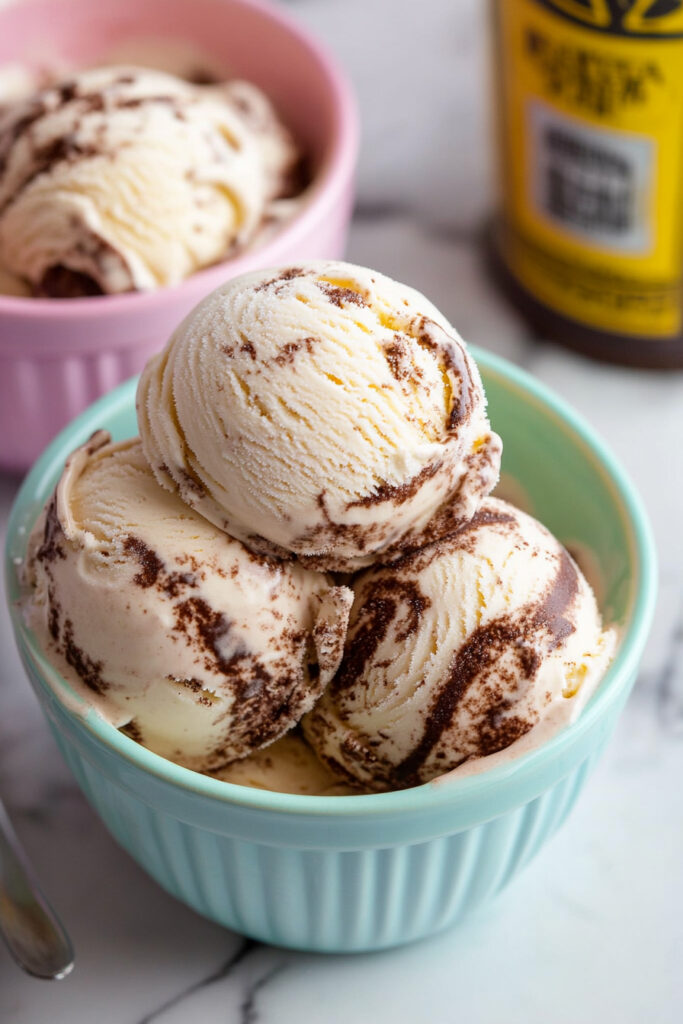
- Serve in chilled bowls or waffle cones. Top with a dusting of cocoa powder or grated chocolate. So simple. So good.
- Pair with biscotti or a shot of espresso for an extra “wow” factor.
Store It Properly
Homemade ice cream is best enjoyed fresh, but you can freeze it for up to two weeks. Press a layer of plastic wrap directly onto the surface before sealing the container—that’ll prevent ice crystals.
So there you have it: a dreamy dessert that’ll transport you straight to an Italian café. Creamy, coffee-packed, and just indulgent enough to satisfy any sweet tooth. Try this recipe, and let me know how it goes—this might just become your new favorite treat!
PrintCuisinart Tiramisu Ice Cream with Mocha Ripple

Indulge in the creamy decadence of tiramisu transformed into a luscious ice cream with swirls of mocha ripple. This dessert combines the bold flavors of coffee and cocoa with a velvety custard base, making it the perfect treat for any occasion. Crafted with a Cuisinart ice cream maker, this recipe is as fun to make as it is to eat!
- Prep Time: 30 minutes
- Cook Time: 10 minutes
- Total Time: 4–6 hours (including freezing)
- Yield: About 1 quart (4–6 servings) 1x
- Category: Dessert
- Cuisine: Italian-inspired
Ingredients
Tiramisu Ice Cream:
- 2 cups (16 fl oz) heavy cream
- 1¼ cups (10 fl oz) whole milk
- ⅓ cup plus 1 tablespoon (75g) granulated sugar
- 3 large egg yolks, room temperature
- Pinch of salt
- 3 tablespoons (1½ fl oz) Kahlua or coffee liqueur (substitute with strong brewed espresso for non-alcoholic)
- 2 tablespoons (1 fl oz) dark rum (optional)
Mocha Ripple:
- 5 teaspoons (20g) granulated sugar
- 2¼ teaspoons agave syrup (or honey)
- 2 tablespoons (1 fl oz) espresso or strong coffee
- 2 tablespoons plus 2 teaspoons (12.5g) unsweetened cocoa powder
Instructions
Step 1: Prepare the Ice Cream Base
- In a saucepan, combine heavy cream, milk, and sugar. Heat gently over medium heat until bubbles form around the edges. Remove from heat and let cool for 5 minutes.
- In a bowl, whisk egg yolks and salt until pale. Slowly pour the warm milk mixture into the yolks while whisking constantly to temper them. Return to the saucepan.
- Cook over low-medium heat, stirring constantly, until the mixture reaches 185°F (85°C). It should coat the back of a spoon without boiling. Stir for an additional 4 minutes at this temperature.
Step 2: Cool the Custard Base
- Strain the custard through a fine mesh strainer into a bowl set over an ice bath. Stir occasionally until completely cool, then refrigerate for at least 2 hours or overnight.
Step 3: Make the Mocha Ripple
- In a small saucepan, whisk together sugar, agave syrup, espresso, and cocoa powder over medium heat until bubbling. Reduce heat to low and cook for another minute until slightly thickened. Let cool completely before using.
Step 4: Churn and Assemble
- Whisk Kahlua and rum into the chilled custard base. Pour into your pre-frozen Cuisinart ice cream maker and churn according to manufacturer instructions (~20–25 minutes). The texture should resemble soft serve when done.
- Spoon half of the churned ice cream into a freezer-safe container. Drizzle half of the mocha ripple on top, then repeat with remaining ice cream and ripple. Use a knife to gently swirl without fully mixing. Cover and freeze for 4–6 hours until firm.
Notes
Serving Suggestions: Serve scoops in chilled bowls or waffle cones with a dusting of cocoa powder or grated chocolate for an elegant finish.
Tips & Tricks:
- Temper eggs carefully by whisking in warm milk slowly to avoid scrambling.
- Don’t over-swirl the mocha ripple; distinct layers add visual appeal and flavor bursts.
- Let the ice cream sit at room temperature for about 5 minutes before scooping for easier serving.
Storage & Reheating: Store in an airtight container in the freezer for up to two weeks. Place plastic wrap directly on the surface to prevent freezer burn.