

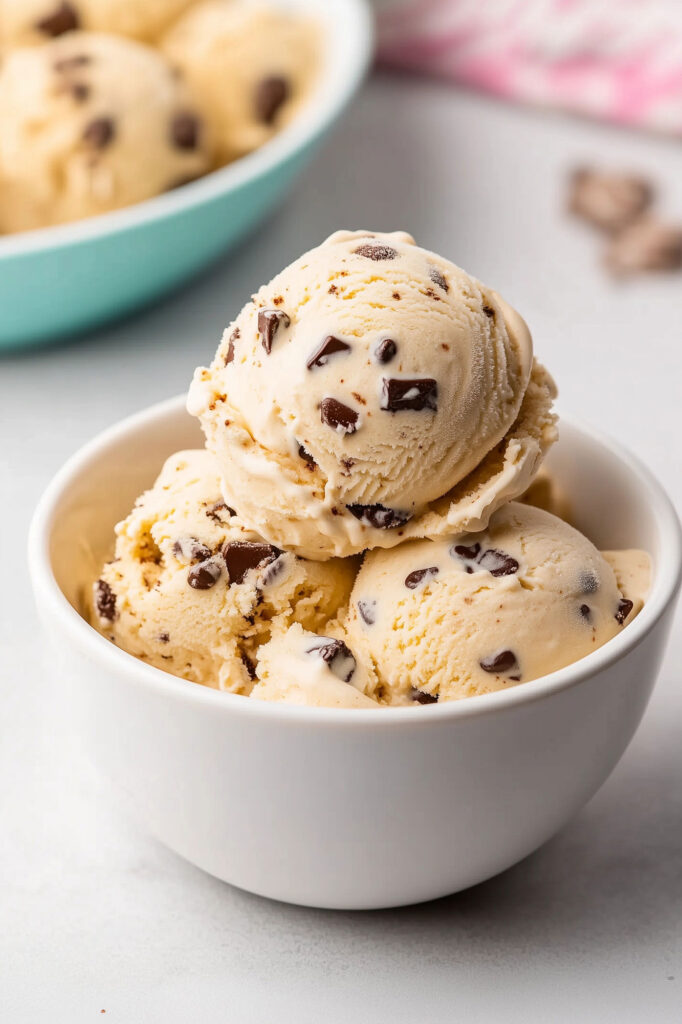
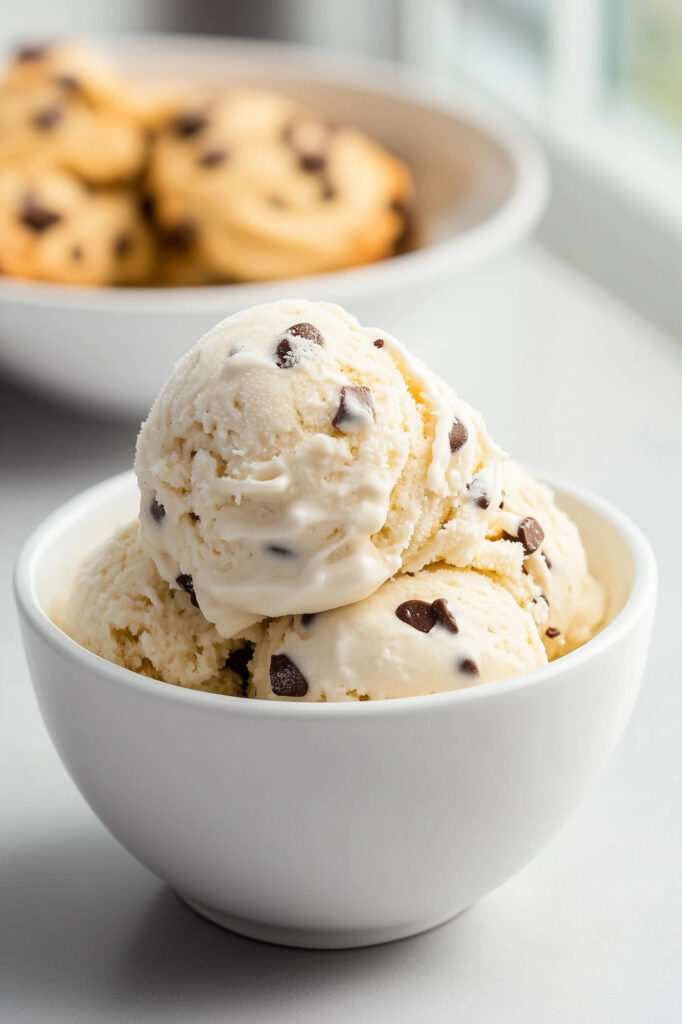
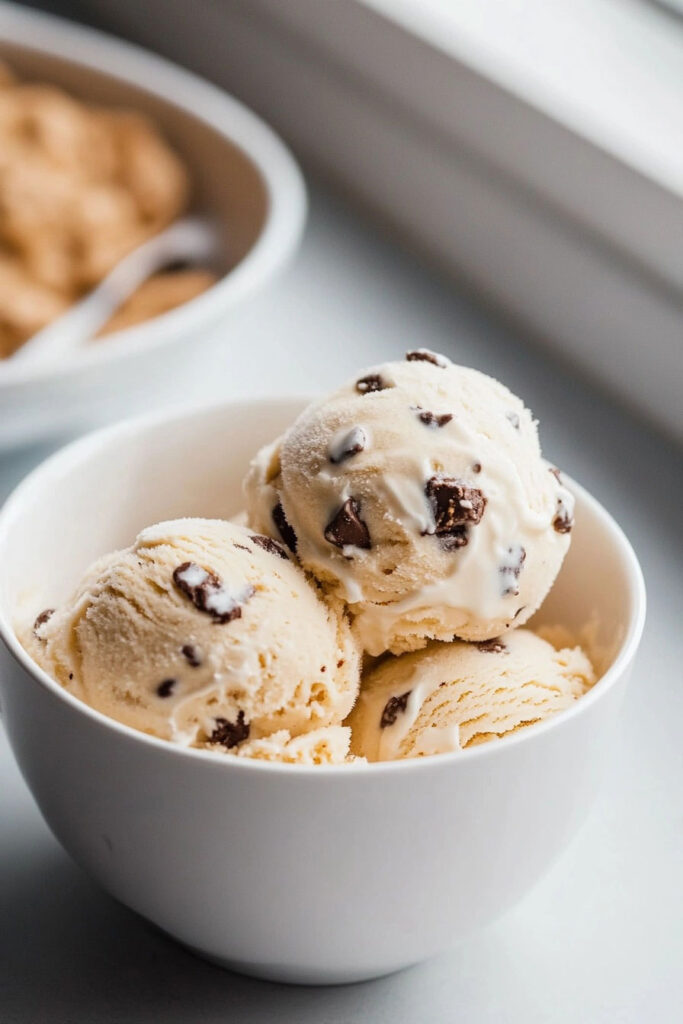
What’s better than ice cream? Ice cream with chunks of soft, gooey cookie dough! This flavor has been winning hearts ever since the 1980s, thanks to a brilliant fan suggestion that turned into Ben & Jerry’s iconic creation. The result? An irresistible combination of creamy vanilla and chewy cookie dough that’s become a classic.
This recipe gives the beloved flavor a twist by adding browned butter for a rich, nutty taste. The best part? It’s easy to make at home, whether you’re treating yourself, sharing with friends, or just looking to impress your guests. Let’s dive in!
Quick Look at the Recipe
How Long Will It Take?
- Prep: 25 minutes
- Cook: 5 minutes
- Chill: 12 hours
- Total: About 12.5 hours (most of that is hands-off!)
How Many Does It Serve?
You’ll get about 10 servings (⅔ cup each). Need less? Halve the recipe. Feeding a crowd? Just double it.
How Hard Is It?
We’d call it intermediate. The steps are simple, but you’ll need to brown butter and whip cream to stiff peaks—easy with a little focus!
What Do I Need?
- Hand mixer or stand mixer
- Saucepan
- Mixing bowls
- Whisk
- Loaf pan or a freezer-safe container
- Spatula
No loaf pan? Any container with a lid will work.

The Ingredients
For the Cookie Dough
- ¼ cup unsalted butter, softened
- 3 tbsp dark brown sugar (light works, too)
- 2 tbsp granulated sugar
- 1 tbsp milk (whole milk is best)
- ½ tsp vanilla extract
- ⅓ cup heat-treated all-purpose flour (important for safety!)
- Pinch of salt
- ⅓ cup mini chocolate chips
Substitution Ideas:
- Dairy-free? Use plant-based butter and almond milk.
- Gluten-free? Swap in a gluten-free flour that’s been heat-treated.
For the Ice Cream Base
- 3 tbsp unsalted butter
- 2 tbsp dark brown sugar (light brown sugar works, too)
- 1 cup sweetened condensed milk (one standard can)
- 1 tsp vanilla extract
- 2 cups chilled heavy cream (right from the fridge!)
- ⅓ cup mini chocolate chips
Pro Tip: The better your vanilla, the better your ice cream. Try vanilla bean paste or high-quality extract for extra flavor.
Let’s Make It! A Step-by-Step Guide
1. Make the Cookie Dough
- Beat the softened butter, brown sugar, and granulated sugar together until smooth and creamy (about a minute).
- Mix in the milk and vanilla extract.
- Gradually stir in the heat-treated flour and salt until fully combined. Add mini chocolate chips.
- Chill the dough while you work on the ice cream base. This makes it easier to handle later.
Safety Tip: Heat-treat your flour by microwaving it in short bursts until it reaches 165°F or baking it at 350°F for 5 minutes. This step kills bacteria.
2. Create the Ice Cream Base
- Melt butter in a small saucepan over medium-low heat. Cook until it turns golden-brown and smells nutty. Stir often to avoid burning.
- Pour the browned butter (with all the little golden bits!) into a bowl and stir in the brown sugar. Let it cool for 15 minutes.
- Whisk in the condensed milk and vanilla extract until smooth.
What to Look For: The butter mixture should be golden-brown with tiny caramelized flecks throughout. So pretty!
3. Whip the Cream
- Use a mixer to whip the cold heavy cream until stiff peaks form.
- Gently mix in half the condensed milk mixture with a spatula. Add the rest and fold until smooth, being careful not to deflate the cream.
- Stir in most of the chocolate chips, saving a few for topping.
Stiff Peaks Check: When you lift your whisk, the peaks should stand tall without drooping. Nailed it!
4. Put It All Together
- Spread half the whipped ice cream into your container.
- Pinch off small bits of cookie dough and scatter them on top.
- Add the remaining ice cream, more cookie dough pieces, and the leftover chocolate chips.
- Cover tightly and freeze overnight.
Pro Tip: Freeze for at least 8 hours (overnight is better) for the perfect scoopable texture.
Make It Your Own
- Seasonal twist: Add crushed peppermint candies in winter or swirl in fresh summer berries.
- Vegan or Dairy-Free? Use coconut cream, vegan butter, and dairy-free chocolate chips.
- Gluten-Free? Easy—just use gluten-free flour for the cookie dough!
- Fancy it up: Add caramel swirls or sprinkle flaky sea salt on top.

Serving & Storing
- To serve: Scoop into bowls or cones and top with extra cookie dough chunks or a drizzle of melted chocolate.
- Storage: Keep in an airtight container in the freezer for up to 2 weeks. Cover the surface with plastic wrap to keep it creamy.
Struggle with scooping? Let the ice cream sit at room temp for 3-5 minutes before serving. It’ll soften just enough.

This homemade cookie dough ice cream is all about comfort and joy. Creamy, chewy, and loaded with flavor, it’s the perfect dessert for any occasion—lazy weekends, family dinners, or just because you deserve it. Trust me, once you try it, you’ll never look at store-bought the same way again!