
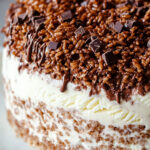
Imagine this: creamy vanilla ice cream, crunchy cereal coated in silky Nutella, and no oven required. Yep—it’s that easy. This Nutella Crunch Ice Cream Cake is the dessert your summer BBQ or holiday gathering has been missing. It’s simple, it’s indulgent, and trust me, it’ll have everyone reaching for seconds.
And the best part? You don’t need to be a pro baker to make it. Just mix, freeze, and enjoy. Ready to impress with minimal effort? Let’s do this.
Quick Recipe Facts
Hands-On Time: 15 minutes
Chill Time: 4-8 hours (or overnight)
Serves: 12-14 people (or 1 ice cream lover with a spoon—no judgment)
Skill Level: Beginner-friendly
What You’ll Need
Ingredients:
- 2 cups Nutella (or any hazelnut-chocolate spread)
- 6 cups Rice Krispies (or puffed rice cereal)
- 1 gallon vanilla ice cream, slightly softened
Optional Swaps:
- No Nutella? Melt some chocolate and mix it with peanut butter. Different but just as yummy.
- Rice Krispies not your thing? Try cornflakes or crushed graham crackers.
- Want a twist? Use chocolate, caramel, or hazelnut ice cream instead of vanilla.
Tools:
- Springform pan (9-10 inches)
- Mixing bowl
- Saucepan
- Parchment paper or plastic wrap
How to Make It
Step 1: Make the Crunch
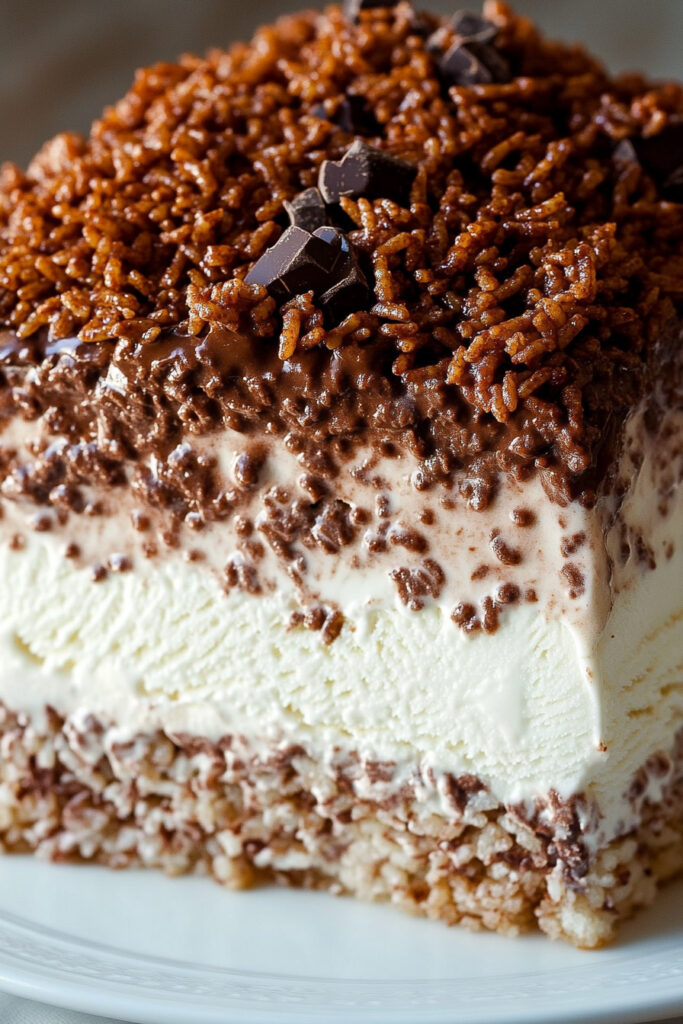
Melt the Nutella in a saucepan on low heat until it’s smooth and glossy. Toss in the Rice Krispies and stir until every piece is coated—no clumps! Spread this mix out on a parchment-lined baking sheet and pop it in the freezer for about 30 minutes.
What to Watch For: The cereal should be shiny and sticky but not rock-hard when it’s chilled.
Step 2: Soften the Ice Cream
While your crunch layer sets, let the ice cream hang out in the fridge for about 30 minutes. You want it soft enough to stir—but not soupy.
Pro Tip: Skip leaving it on the counter. The fridge keeps it soft and under control.
Step 3: Mix the Base
Take that Nutella crunch out of the freezer and chop it into small, bite-sized bits. Save about 2 cups for the topping. Mix the rest into your softened vanilla ice cream in a cold bowl. Stir it just until combined—don’t overdo it, or it’ll melt!
Step 4: Assemble the Cake
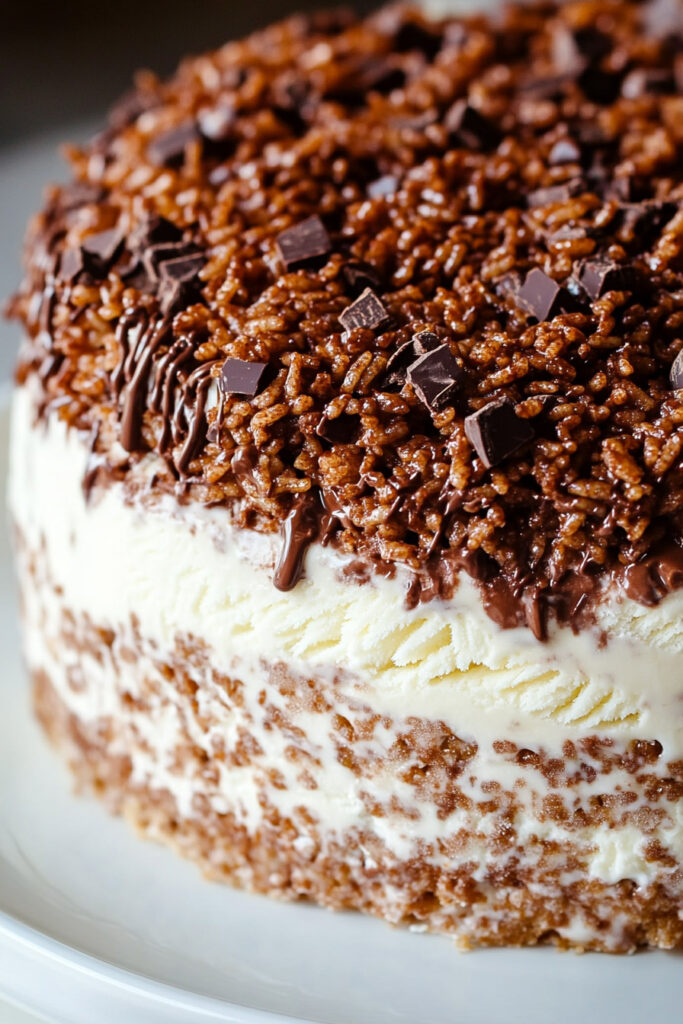
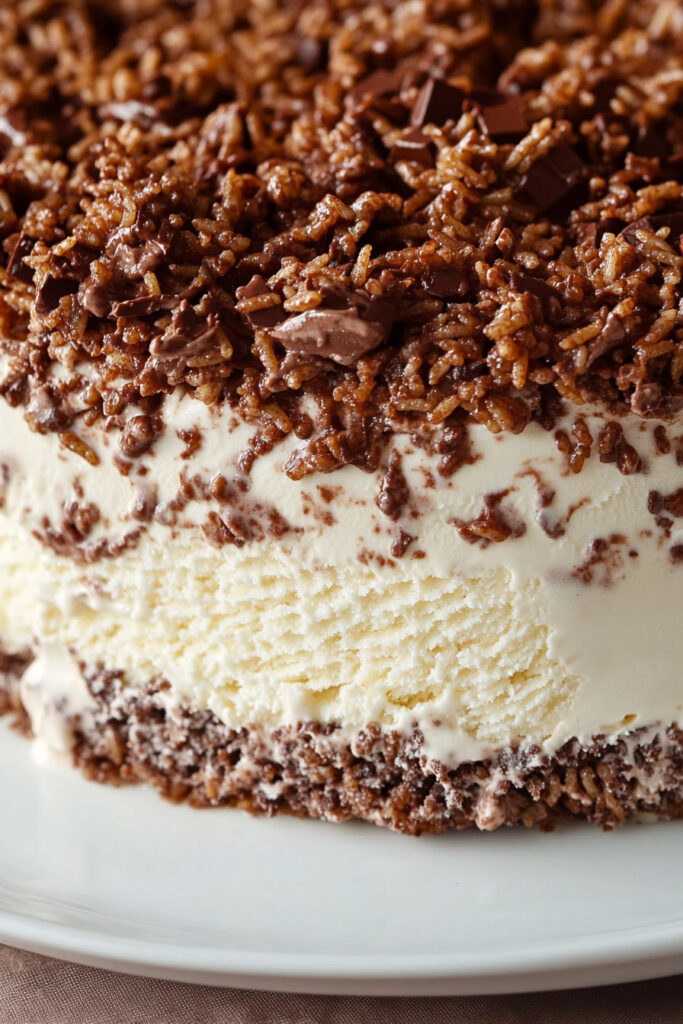
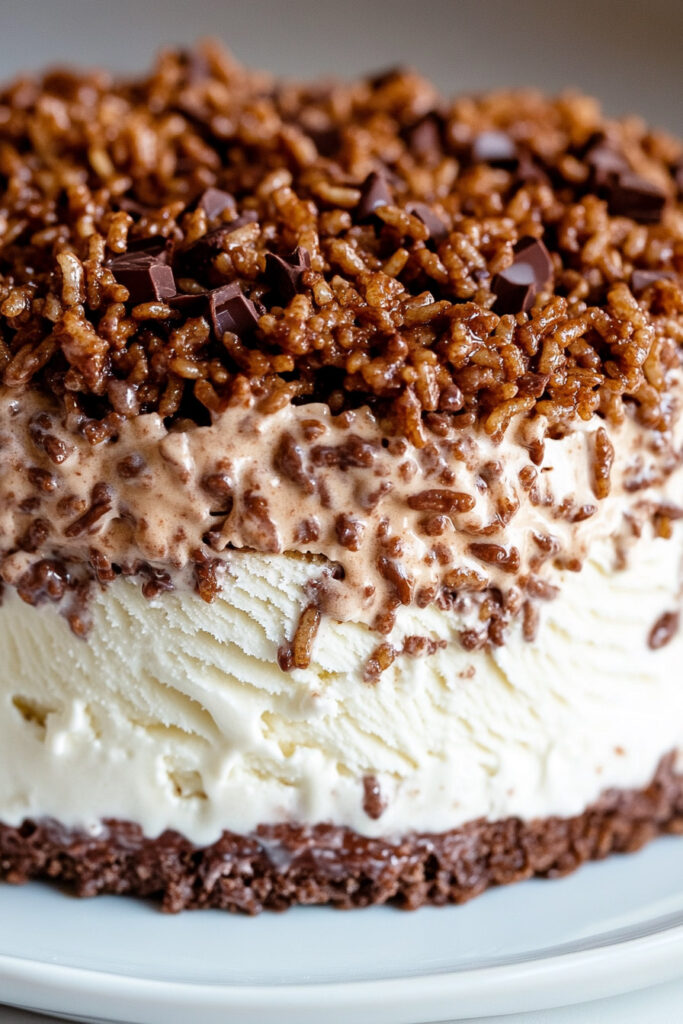
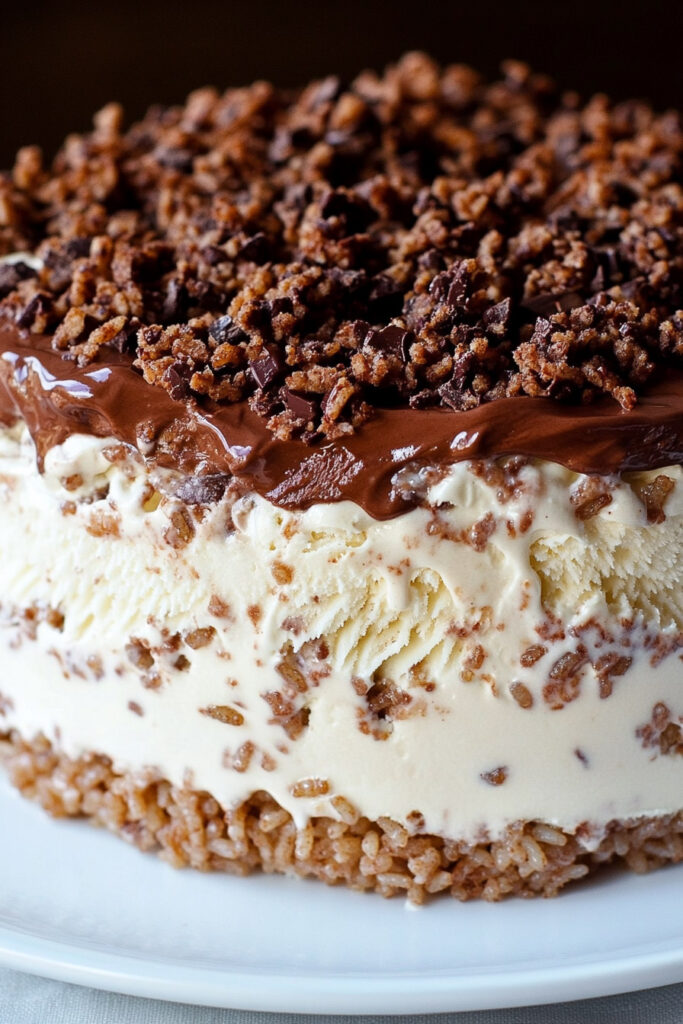
Line your springform pan with parchment paper or plastic wrap. Scoop the ice cream mixture into the pan and pack it down with a spatula. No air pockets—those make slicing tricky. Sprinkle the reserved crunch pieces on top and smooth it all out.
Bonus Tip: Want a super-clean look? Run your spatula under hot water for that smooth, bakery-style finish.
Step 5: Freeze and Chill
Cover the pan with plastic wrap and freeze for at least 4 hours or—if you can wait that long—overnight.
Step 6: Serve Like a Pro
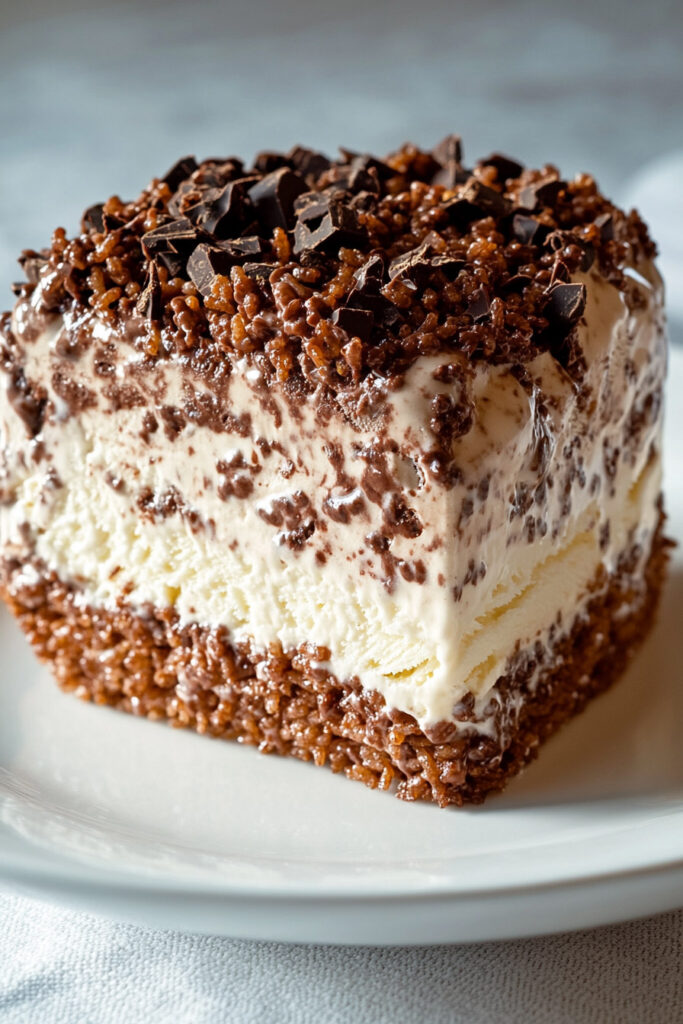
Before serving, move the cake from the freezer to the fridge about 30 minutes ahead. This softens it just enough to slice. Use a knife warmed under hot water (wipe it dry) for clean cuts. Serve immediately and watch everyone dive in.
What You’ll Notice: The cake slices like a dream and stays firm enough to hold together while you eat.
Customize Your Cake
Make It Yours:
- Layer in crushed Oreos or chocolate chips for extra texture.
- Drizzle caramel sauce over each slice before serving.
- Add chopped nuts, like hazelnuts or almonds, for a nutty crunch.
Diet-Friendly Options:
- Gluten-free? Use certified GF puffed rice cereal.
- Vegan? Sub dairy-free ice cream and a vegan hazelnut spread.
Serve It Festive:
For the holidays, sprinkle crushed candy canes or festive sprinkles on top!
Storing Leftovers (If You Have Any)
Wrap slices individually in plastic wrap to keep them fresh and pop them in an airtight container in the freezer. They’ll stay good for up to a week—perfect for a late-night snack.
Final Thoughts
There you go—a no-fuss, no-bake dessert that’s guaranteed to steal the show. Whether it’s for a casual dinner with friends or a special celebration, this Nutella Crunch Ice Cream Cake hits all the right notes: creamy, crunchy, sweet, and so satisfying.
Go on, give it a try. Just don’t expect leftovers.
PrintNutella Crunch Ice Cream Cake
This Nutella Crunch Ice Cream Cake is a no-bake, three-ingredient dessert that combines creamy vanilla ice cream, crispy Rice Krispies cereal, and rich Nutella for a perfect balance of textures and flavors. It’s easy to make, ideal for parties, and can be prepared ahead of time for stress-free entertaining.
- Prep Time: 15 minutes
- Cook Time: None
- Total Time: 4 hours 15 minutes (including chilling/freezing)
- Yield: 12–14 slices 1x
- Category: Dessert
- Cuisine: American-inspired
Ingredients
- 2 cups Nutella
- 6 cups Rice Krispies cereal
- 1 gallon vanilla ice cream, softened slightly
Substitutions:
- Replace Rice Krispies with puffed rice or cornflakes for a variation in crunch.
- Use chocolate or hazelnut-flavored ice cream for a richer taste.
Instructions
Step 1: Prepare the Nutella Crunch
- In a large saucepan over low heat, melt the Nutella until smooth. Add the Rice Krispies cereal and gently fold until fully coated.
- Spread the mixture evenly on a parchment-lined baking sheet and freeze for about 30 minutes until firm but not frozen solid.
Step 2: Soften the Ice Cream
- While the crunch cools, place the ice cream in the refrigerator to soften slightly (about 30 minutes). It should be soft enough to stir but not melted.
Step 3: Assemble the Cake
- Once the Nutella crunch is firm, cut it into bite-sized pieces using a knife and fork. Reserve 2 cups of these pieces for topping.
- Mix the remaining pieces into the softened ice cream in a chilled mixing bowl until evenly distributed.
Step 4: Build and Freeze
- Line a 9 or 10-inch springform pan with parchment paper or plastic wrap. Transfer the ice cream mixture into the pan, pressing firmly to remove air pockets. Smooth out the top and sprinkle with the reserved Nutella crunch pieces.
- Cover with plastic wrap and freeze for at least 4 hours or overnight until completely set.
Step 5: Serve
- Remove from freezer about 30 minutes before serving to soften slightly in the refrigerator. Release the sides of the springform pan, slice with a warm knife (run under hot water), and serve immediately.
Notes
Serving Suggestions:
- Garnish with whipped cream, fresh berries, or a drizzle of melted chocolate for extra flair. Serve on chilled plates to prevent melting too quickly.
Tips & Tricks:
- Work quickly when mixing softened ice cream with the crunch to prevent melting.
- Use a spatula dipped in warm water to smooth out layers for a polished look.
- For clean slices, run your knife under hot water between cuts.
Storage & Reheating:
- Store leftover cake in an airtight container in the freezer for up to one week.
- To enjoy later, let slices sit at room temperature for about 10 minutes before serving.