

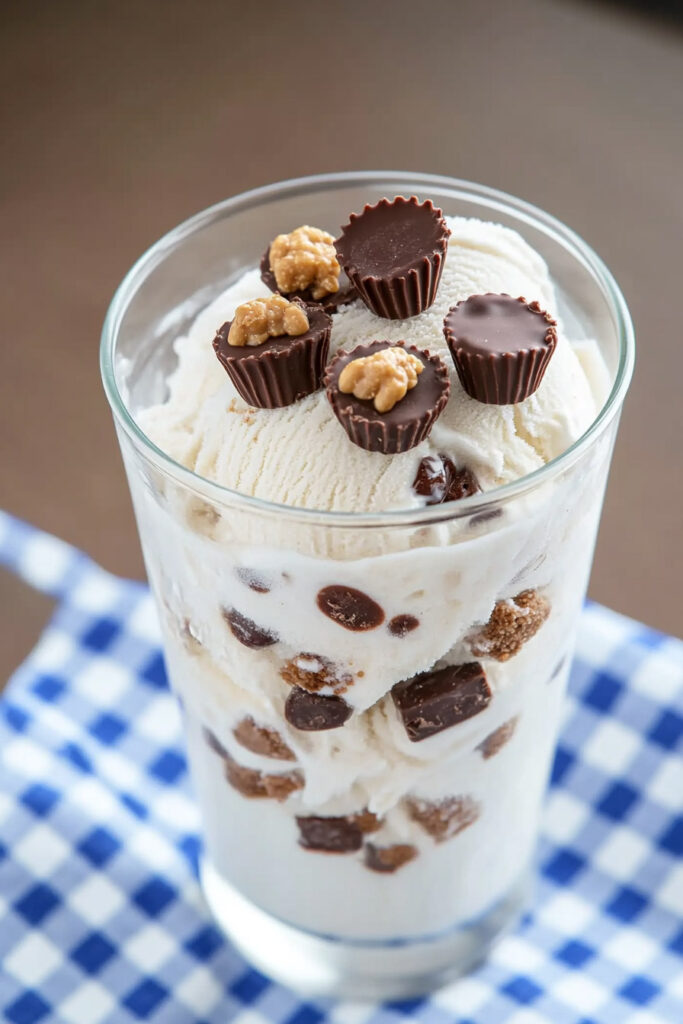
Who doesn’t love a Blizzard from Dairy Queen? That creamy, cookie-studded goodness is a classic. But what if I told you that you could whip up your own version at home? Yep, with just a Ninja Creami and a few simple ingredients, you’re all set to recreate that thick, mix-in-loaded treat right in your kitchen.
This recipe is perfect whether you’re looking for a fun dessert project or just craving a nostalgic treat. The best part? You can customize it however you like. Reese’s cups? Crushed Oreos? M&Ms? The choice is yours. Let’s dive in!

Quick Details
- Time Needed: 5 minutes to prep, 24 hours to freeze, a couple of minutes to churn.
- Servings: Makes one pint. Ideal for one or two people. Want more? Double the recipe and freeze in extra containers.
- Difficulty: Super simple. You don’t need to be a kitchen pro to nail this.
- Tools You’ll Need:
- The Ninja Creami
- The pint container that comes with it
- An immersion blender (optional but helpful)
No immersion blender? No biggie. A whisk or regular blender works, too.
What You’ll Need
Ingredients
- 1 cup milk
- ¾ cup whipped topping (like Cool Whip)
- 1 tablespoon vanilla ice cream mix (Junket is my go-to)
- ½ cup heavy cream
- ¼ teaspoon vanilla extract
- ¼ cup chopped Reese’s cups (plus extras for garnish, if you’re feeling fancy!)
Optional Swaps
- Milk: Go for almond, oat, or soy milk if you prefer dairy-free.
- Whipped Topping: Coconut whipped cream is a great vegan option.
- Vanilla Ice Cream Mix: No Junket? Instant vanilla pudding mix works just fine.
- Candy: Not a Reese’s fan? Try M&Ms, crushed Oreos, or whatever sweet treat you love.
Let’s Make It

Step 1: Mix the Base
In a bowl, combine your milk, whipped topping, and ice cream mix. Use an immersion blender to mix everything until it’s smooth. No lumps, just a silky base that smells like vanilla heaven.
Step 2: Add Heavy Cream and Vanilla
Pour in the heavy cream and stir in the vanilla extract. Be gentle—don’t overmix. The goal here is a creamy base, not too much air.
Step 3: Freeze
Pour the mixture into your Ninja Creami pint container. Snap the lid on tight, and pop it in the freezer. You’ll need to let it freeze for at least 24 hours. (Pro tip: Overnight works perfectly.)
Step 4: Churn It
Once the base is frozen solid, it’s go time. Take off the lid, place the pint in the Ninja Creami machine, and hit the “Ice Cream” button. Let the machine do its magic. If it looks a little crumbly after the first round, don’t freak out. Just hit the “Re-spin” button for a smoother texture.
Step 5: Add the Good Stuff
Make a little well in the center of the ice cream. Toss in your chopped Reese’s cups (or whatever mix-ins you’re using) and press the “Mix-In” button. The machine will evenly distribute those tasty bits throughout your ice cream, just like Dairy Queen does.
Step 6: Serve and Enjoy
Scoop your homemade Blizzard into a bowl or cup, top it with extra candy if you’re feeling bold, and dig in!
Customize Your Blizzard

Here’s where you can get creative:
Dietary Tweaks:
- Dairy-free? Use almond milk and vegan whipped topping.
- Gluten-free? Stick to certified gluten-free candies or toppings.
Flavor Upgrades:
- Add a pinch of cinnamon or chili powder if you like a spicy-sweet kick.
- Drizzle some caramel or chocolate sauce on top for a fancier finish.
Seasonal Spins:
- Peppermint bark for Christmas.
- Jelly beans for Easter.
- Pumpkin spice mix-ins for fall.
The possibilities? Endless.
Tips for Serving and Storing

Serving Ideas
Serve in chilled bowls to keep it cold longer. Want to make it party-ready? Add fun extras like sprinkles or edible glitter.
Storing Leftovers
Not that there will be much left (this stuff is addictive), but if you do, stash it in an airtight container. It’ll keep in the freezer for about a week. Before you eat it again, let it sit out for 5 minutes and re-spin it in your Ninja Creami to bring back that creamy texture.
See? Making your own Blizzard at home isn’t just easy—it’s fun. Plus, there’s something so satisfying about customizing your dessert just the way you like it. So grab your Ninja Creami, raid your pantry for mix-ins, and treat yourself. You’ve earned it.
PrintNinja Creami Copycat Blizzard

Indulge in a creamy, decadent treat inspired by Dairy Queen’s Blizzard, made effortlessly at home using the Ninja Creami. This customizable dessert combines a rich vanilla base with chunks of Reese’s cups for the ultimate comfort food experience.
- Prep Time: 5 minutes
- Cook Time: 2 minutes (churning)
- Total Time: 24 hours 7 minutes (includes freezing)
- Yield: 1 pint (2 servings) 1x
- Category: Dessert
- Cuisine: American
Ingredients
- 1 cup milk
- ¾ cup whipped topping (e.g., Cool Whip)
- 1 tablespoon Junket vanilla ice cream mix
- ½ cup heavy cream
- ¼ teaspoon vanilla extract
- ¼ cup mini Reese’s cups, chopped (plus extra for garnish, optional)
Instructions
- Prepare the Base: In a mixing bowl, blend milk, whipped topping, and Junket mix using an immersion blender until smooth. Stir in heavy cream and vanilla extract until combined.
- Freeze: Pour the mixture into a Ninja Creami pint container. Close the lid and freeze on a level surface for at least 24 hours.
- Churn: Remove the container from the freezer and place it in the Ninja Creami machine. Lock it in place and press the “Ice Cream” button. If the texture is crumbly, press “Re-spin” to smooth it out.
- Add Mix-ins: Create a small well in the center of the ice cream and add chopped Reese’s cups. Use the “Mix-In” button to incorporate them evenly.
- Serve: Scoop into bowls or cups and garnish with extra Reese’s cups if desired. Enjoy immediately!
Notes
Serving Suggestions:
- Serve in chilled bowls for optimal texture.
- Pair with warm brownies or cookies for a delightful contrast.
Tips & Tricks:
- Use cold ingredients for a smoother base.
- If the ice cream is too hard after freezing, let it sit at room temperature for 5 minutes before churning.
Storage & Reheating:
- Store leftovers in an airtight container in the freezer for up to one week.
- To refresh frozen leftovers, re-spin in the Ninja Creami machine using the “Re-spin” button.