

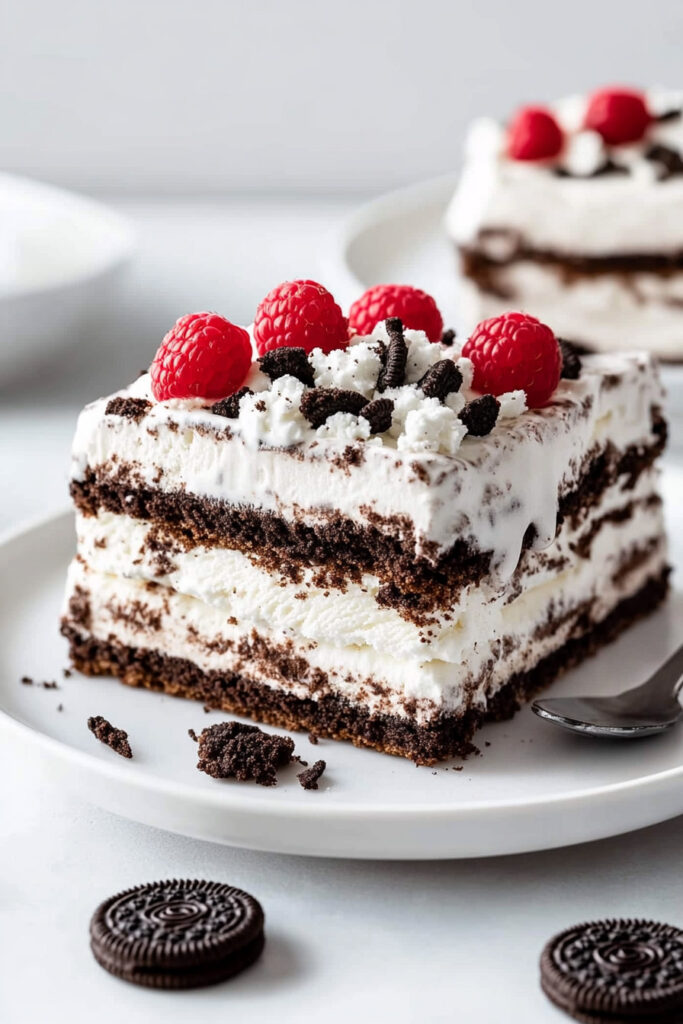
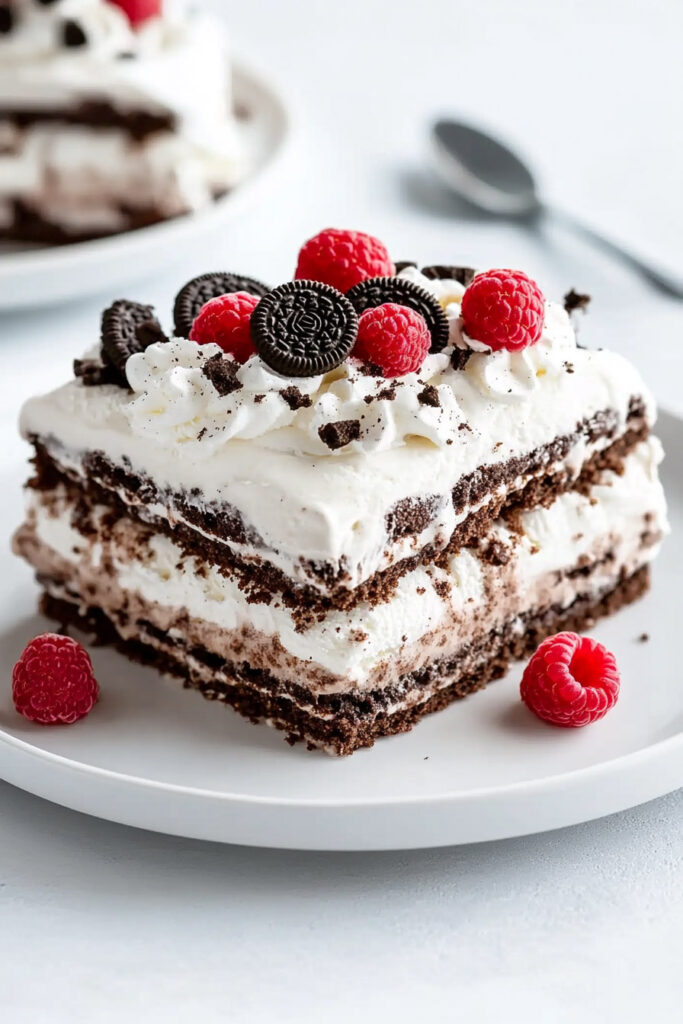
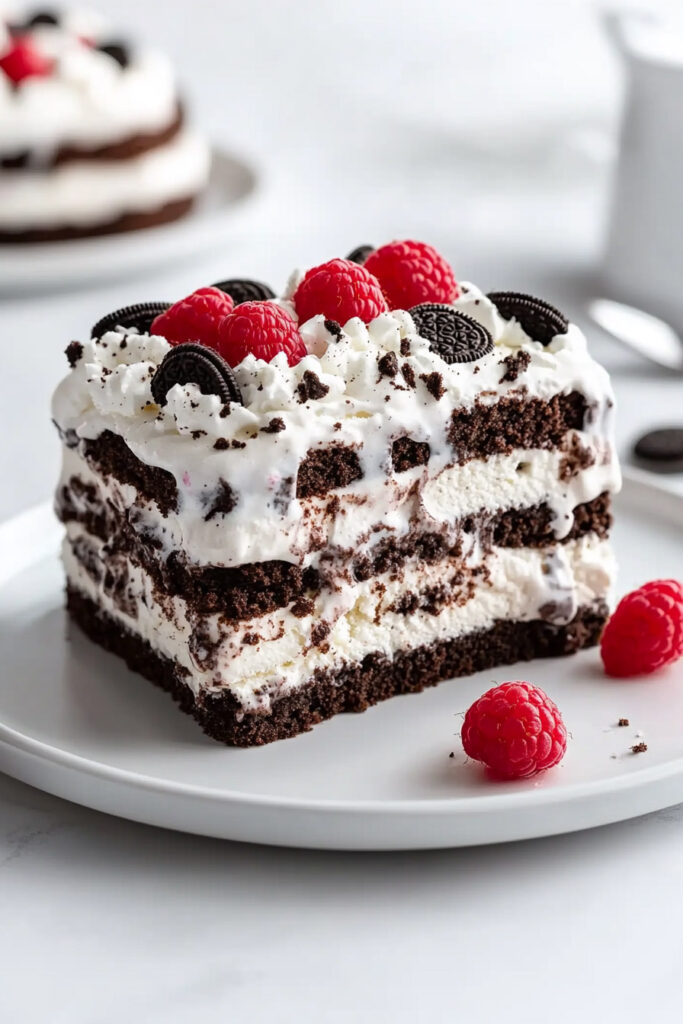
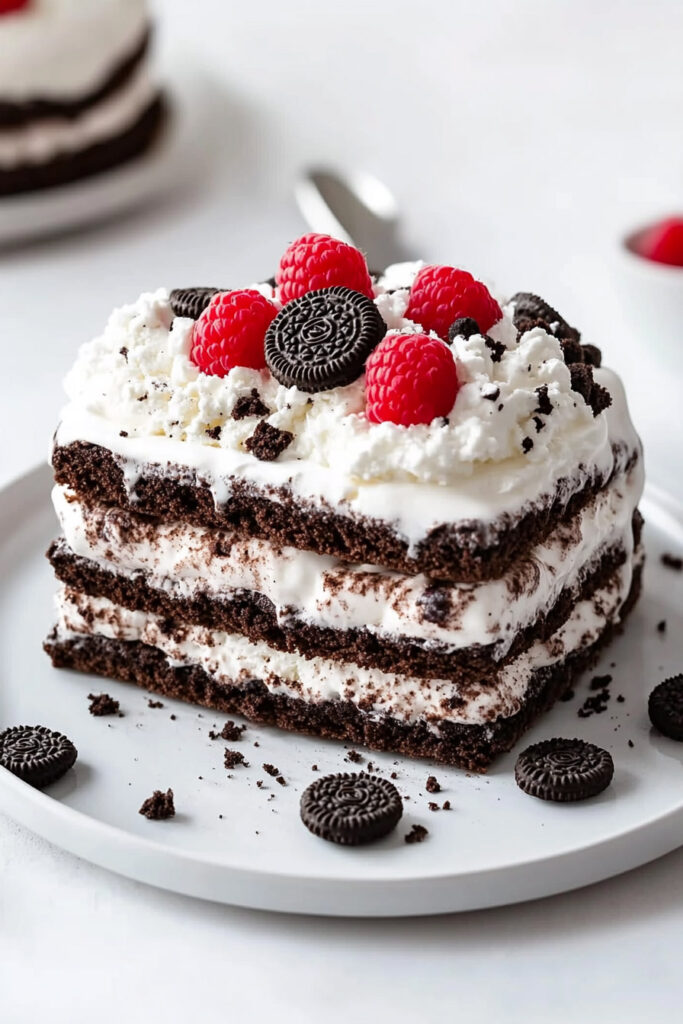
Ice Cream Sandwich Cake is one of those desserts that just hits differently. It’s no-bake, super simple, and loaded with all the nostalgic vibes of summer. Remember those ice cream sandwiches you loved as a kid? This cake takes that childhood favorite and gives it a fun, shareable twist.
Here’s the best part: You need only a handful of ingredients, and it’s impossible to mess up. Perfect for a barbecue, a weekend hangout, or even a quick last-minute dessert. Bonus? You barely have to lift a finger.
Quick Recipe Highlights
- Prep Time: 15 minutes of assembly
- Chill Time: 3 hours (or longer, if making ahead)
- Servings: 9 big slices (or more if you cut smaller pieces)
- Skill Level: A total beginner can crush this
- What You’ll Need:
- A square pan (9×9 works best)
- Parchment paper (trust me, this makes life easier)
- A mixing bowl and a spatula
Make-ahead tip: This dessert freezes beautifully, so you can whip it up days in advance. Just pull it out when it’s time to wow your guests.
What You’ll Need
Base Ingredients:
- 14 ice cream sandwiches: Classic vanilla is a go-to, but chocolate or Neapolitan are fun swaps.
- 8 oz whipped topping (like Cool Whip): Let it thaw slightly so it’s easier to spread.
Toppings & Extras:
- 14 Oreos: Chop them up. Want variety? Use graham crackers, candy bars, or chocolate chips instead.
- 1 jar (11 oz) hot fudge sauce: Warm it a little to make spreading easier. Caramel or peanut butter sauce works too if you’re feeling adventurous.
How to Make It
Step 1: Prep Your Pan
Line a square baking pan (9×9 or something similar) with parchment paper. Leave some extra over the edges—this makes the cake easier to lift out when it’s frozen.
Step 2: Mix Up the Oreo Topping
In a bowl, gently fold about two-thirds of the chopped Oreos into the whipped topping. Save the rest for sprinkling on later.
Step 3: Layer It Up
- Lay half the ice cream sandwiches on the bottom of the pan in a single layer.
- Spread half the warmed fudge sauce over the sandwiches.
- Add a layer of the Oreo whipped topping.
Step 4: Repeat
Do all that again—layer more sandwiches, fudge, and whipped topping. Smooth out the top layer so it looks nice.
Step 5: Garnish & Freeze
Sprinkle the remaining Oreo pieces over the top. Cover the whole thing with plastic wrap or foil and pop it in the freezer for at least 3 hours. That’s it. Easy, right?

Pro Tips for Success
- Work fast! Ice cream sandwiches can melt quickly, especially in a warm kitchen.
- If your whipped topping gets too soft while assembling, stick it in the freezer for a couple of minutes.
- Slice it with a hot knife for clean edges. Just run the knife under warm water, dry it off, and cut.
Fun Customizations

Want to shake things up? Try these ideas:
Flavor Swaps:
- Add a layer of chopped candy like Reese’s or Snickers for extra crunch.
- Use caramel or strawberry sauce instead of fudge.
- Feeling festive? Sprinkle crushed peppermint on top during the holidays or add fresh berries in the summer.
Dietary Tweaks:
- Need it gluten-free? Swap traditional ice cream sandwiches and Oreos for gluten-free versions.
- Going vegan? Use plant-based ice cream sandwiches and coconut or almond-based whipped topping.
Serving & Storing Tips
How to Serve:
Take the cake out of the freezer about 10–15 minutes before serving—it makes slicing much easier. Cut it into squares or rectangles straight from the pan. Serve on chilled plates so it stays frozen longer. Want to get fancy? Add an extra drizzle of fudge or a dollop of whipped cream on top.
Leftovers?
Wrap them tightly in plastic wrap or foil and store in the freezer for up to a week. Although, let’s be real—it probably won’t last that long!
This Ice Cream Sandwich Cake is everything you want in a summer dessert: easy to make, fun to eat, and guaranteed to bring back great memories. Plus, it’s endlessly customizable, so you can tweak it to fit pretty much any occasion. Go ahead and give it a try—you’ll thank me later!
PrintIce Cream Sandwich Cake

This Ice Cream Sandwich Cake is the perfect dessert for hot days or when you need a quick, crowd-pleasing treat. Layers of creamy ice cream sandwiches, rich fudge sauce, and Oreo whipped topping come together in this no-bake masterpiece. It’s a nostalgic dessert with a modern twist that’s as fun to make as it is to eat!
- Prep Time: 15 minutes
- Cook Time: None
- Total Time: 3 hours 15 minutes (including freezing)
- Yield: 9 slices 1x
- Category: Dessert
- Cuisine: American
Ingredients
- 14 full-size ice cream sandwiches (vanilla or your favorite flavor)
- 8 ounces whipped topping (Cool Whip or TruWhip, thawed)
- 14 Oreo cookies, chopped into small pieces
- 1 jar (11 oz) hot fudge sauce, slightly warmed for easy spreading
Substitutions:
- Swap Oreos with graham crackers, chocolate chips, or crushed candy bars for variety.
- Use caramel or peanut butter sauce instead of fudge for a flavor twist.
Instructions
Line a 9×9-inch baking pan with parchment paper, leaving enough overhang on the sides for easy removal later.
In a medium bowl, gently fold two-thirds of the chopped Oreos into the whipped topping until evenly combined. Reserve the remaining Oreos for garnish.
Place half of the ice cream sandwiches in an even layer at the bottom of the prepared pan. Trim sandwiches as needed to fit snugly.
Spread half of the warmed fudge sauce over the sandwiches. Then, spread half of the Oreo whipped topping mixture evenly on top.
Add another layer of ice cream sandwiches, followed by the remaining fudge sauce and whipped topping mixture.
Sprinkle the reserved chopped Oreos over the top layer. Cover tightly with plastic wrap or foil and freeze for at least 3 hours, or until firm.
Notes
Serving Suggestions:
- Slice with a warm knife for clean cuts. Serve on chilled plates to prevent melting too quickly.
- Drizzle with extra fudge or caramel sauce for added flair.
Tips & Tricks:
- Work quickly to prevent ice cream sandwiches from softening too much during assembly.
- Use a hot knife (run under warm water and wiped dry) to slice through frozen layers effortlessly.
Storage & Reheating:
- Store leftovers tightly wrapped in plastic wrap or foil in the freezer for up to one week. For best flavor and texture, consume within two days.
- Allow cake to sit at room temperature for about 10–15 minutes before slicing to make cutting easier—no reheating necessary!