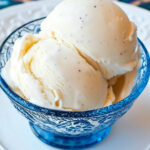
Ninja Creami Vanilla Bean Ice Cream
A creamy, rich, and indulgent homemade vanilla bean ice cream made effortlessly with the Ninja Creami. Perfect for dessert lovers looking to elevate their sweet treats with a burst of real vanilla flavor and a smooth, luscious texture.
- Prep Time: 5 minutes
- Cook Time: None
- Total Time: ~24 hours 5 minutes (Freezing Time: 24 hours)
- Yield: 1 pint 1x
- Category: Dessert
- Cuisine: American
Ingredients
Scale
- ½ tablespoon cream cheese (room temperature)
- ⅓ cup granulated sugar
- 1 teaspoon vanilla bean paste
- ½ cup heavy whipping cream
- 1¼ cups whole milk
Instructions
- Blend the Base: In a blender or mixing bowl, combine softened cream cheese, sugar, vanilla bean paste, heavy whipping cream, and whole milk. Blend until smooth and fully combined.
- Freeze the Mixture: Pour the mixture into a Ninja Creami pint container, ensuring it is level and does not exceed the max fill line. Freeze on a flat surface for 24 hours without the lid to prevent bumps on top.
- Process in the Ninja Creami: After freezing, place the pint container into the outer bowl of the Ninja Creami machine. Lock it in place and select the “Ice Cream” setting.
- Adjust Texture (if needed): If the ice cream looks crumbly after processing, add 1–2 tablespoons of milk and re-spin until creamy. Repeat as necessary for desired texture.
- Serve and Enjoy: Scoop into bowls or cones and savor your homemade vanilla bean ice cream!
Notes
Serving Suggestions:
- Pair with warm brownies, apple pie, or fresh berries for a decadent dessert.
- Add toppings like chocolate chips or caramel drizzle for extra indulgence.
Tips & Tricks:
- For smoother texture, ensure all ingredients are well-blended before freezing.
- Use high-quality vanilla bean paste for intense flavor and beautiful speckles in your ice cream.
Storage & Reheating:
- Store leftovers in an airtight container in the freezer for up to one week. Let sit at room temperature for 5–10 minutes before scooping to soften naturally—avoid microwaving.
Find it online: https://icecreamin.com/ninja-creami-vanilla-bean-ice-cream/
